TS-0811-0012 OPR V2 Turbo Oil Pressure RegulatorUpdated 25 days ago
Important Notes on Your Oil Pressure Regulator
- Turbosmart accepts no responsibility whatsoever for incorrect installation of this product which is potentially hazardous and can cause serious
engine damage or personal injury.
FLOW DIRECTION IS important. Incorrect plumbing will not allow oil to flow through the OPR
This is NOT an adjustable regulator.
The filter should be cleaned thoroughly and/or replaced as required in line with engine oil changes. Confirm engine oil filter is finer then OPR.
The internal filter should be cleaned at regular oil change intervals. Failure to clear filter of particulates may restrict oil flow and change the regulated pressure.
The internal filter should be kept in the same orientation after cleaning to minimise and left-over particles aren’t dislodged during normal operation.
Ensure that all plumbing is appropriately secured.
Your turbo oil pressure regulator should be mounted at least 100mm from any significant heat source.
OPR will be full flow (inlet pressure) while underneath regulation pressure, regulation will occur once over regulation pressure.
Example Below regulation Engine Oil Pressure 35psi OPR MAX pressure 35psi
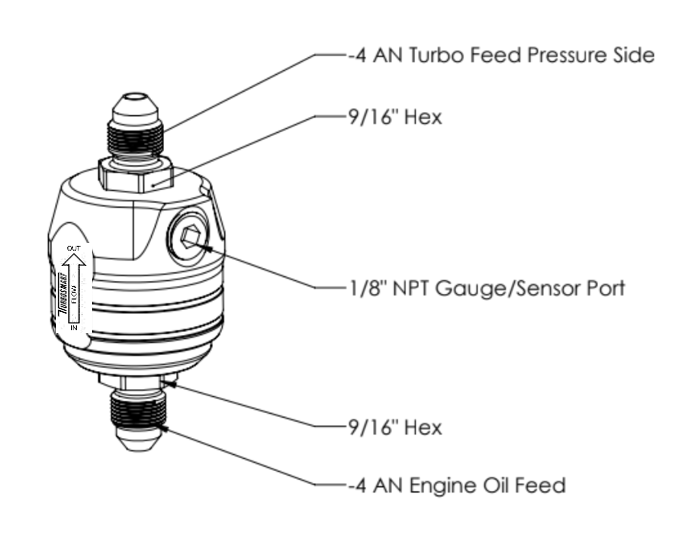
- Gauge port is 1/8” NPT.
Preinstalled restrictors on turbochargers should remain intact.
Recommendations
- Turbosmart recommends that an appropriately qualified technician fits your turbo oil pressure regulator (OPR)
- Turbosmart recommends that your engine oil pressure is checked after fitment to ensure engine oil and turbo oil pressure is satisfactory.
- Turbosmart recommends that the oil pressures are monitored closely.
- Turbosmart recommends that in the event of an engine failure, the filter and O Rings be replaced with the rebuild kit (TS-0801-3001) and thoroughly clean the internals inspecting for any damage before reassembly.
How to Install Your Oil Pressure Regulator
Kit Contents
Please check that the following items have been provided in your OPR kit.
Quantity | Description | Use |
1 | Turbosmart OPR | Main Unit |
1 | Turbosmart Sticker | Turbosmart Sticker |
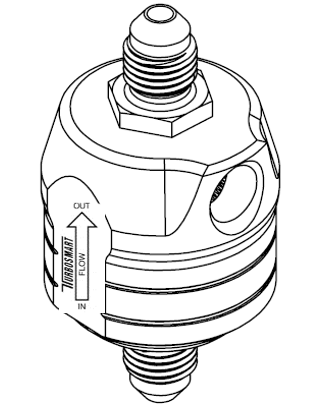
Figure 1 - Kit Contents
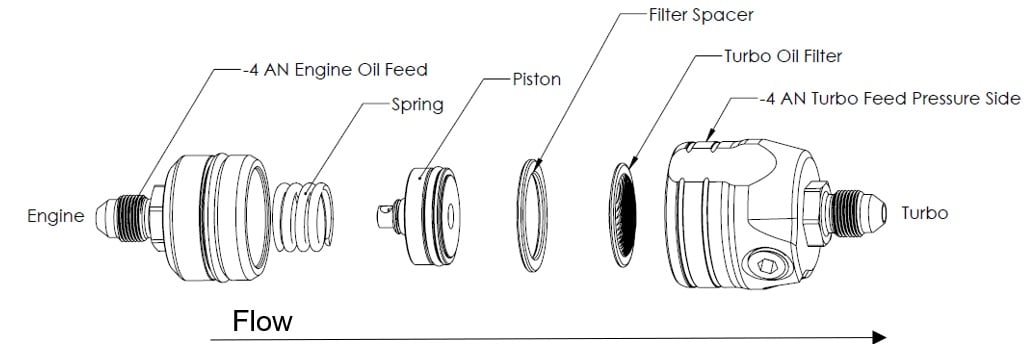
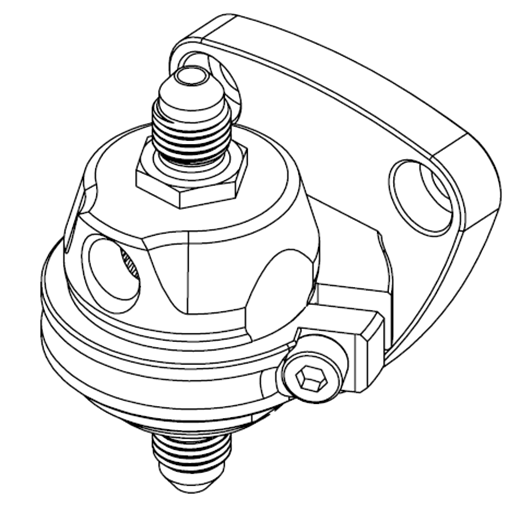
Figure 2 - OPR Overview
Tools Required
- Non- marking spanners to tighten fittings
- Allen Key Set
Fitting Your OPR
Locate the Turbo Oil Pressure Feed Line and Determine the Mounting Location
This line is usually found on the top of the turbo centre housing rotating assembly (CHRA) that feeds the turbo for lubrication and cooling. Take time to determine where you wish to mount the OPR in the engine bay.
Note: Direction is important. The Turbo side must be plumbed to the Turbo.
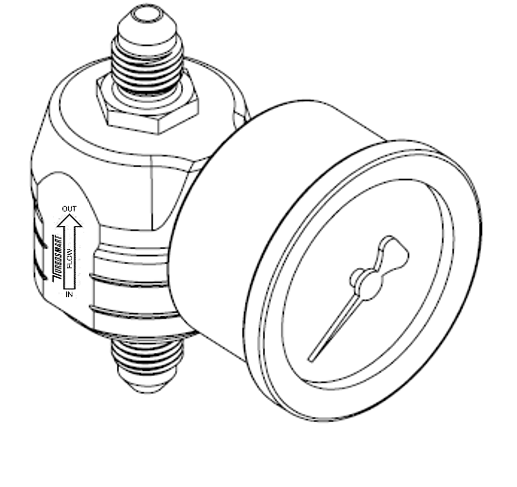
Fit Gauge or Sensor Port (STRONGLY Recommended)
Note! - Oil Pressure should be verified with a mechanical gauge minimum.
This step is optional but highly recommended. Before mounting the OPR, install a 1/8” NPT gauge or sensor. Unscrew the existing 1/8” NPT blank anti-clockwise with a 3/16” hex key. Apply thread lubricant and screw in clockwise until finger tight, then tighten further 1-2 turns for seal. Turbosmart gauge kit optional – TS-0402-2023.

Mounting your OPR (OPTIONAL)
With all lines installed onto the OPR, the OPR can now be mounted. Place the mounting bracket over the base of the OPR in the orientation of your choice, your mounting bracket is now successfully installed, and you can now mount your OPR in your desired location.
TS-0801-3002
Start engine and check for leaks
Congratulations, your OPR is installed and ready for use. Double check all fittings, lines and mountings then proceed to start engine and check for leaks. No adjustment is required.
WARNING!
Ensure to verify Engine Oil Pressure as well as Turbo Oil Pressure
CAUTION! If oil leaks are present – switch off engine immediately and rectify leaks.
Filter Maintenance
The filter should be cleaned thoroughly and/or replaced as required in line with engine oil changes, research into the engine oil filtration will give an idea on how quickly debris will be caught in the OPR filter. Ideally the Engine Oil Filter is finer than that of the OPR V2 with a 44 micron filter. Otherwise increase frequency of filter inspections should be conducted.
To do this, we need two non-marking 9/16” Spanners to disassemble with anticlockwise rotation. The Filter can then be accessed for cleaning. Use a combination of compressed air and elastomer safe degreasers spraying through from the outlet side to dislodge particles on the inlet side of the filter.
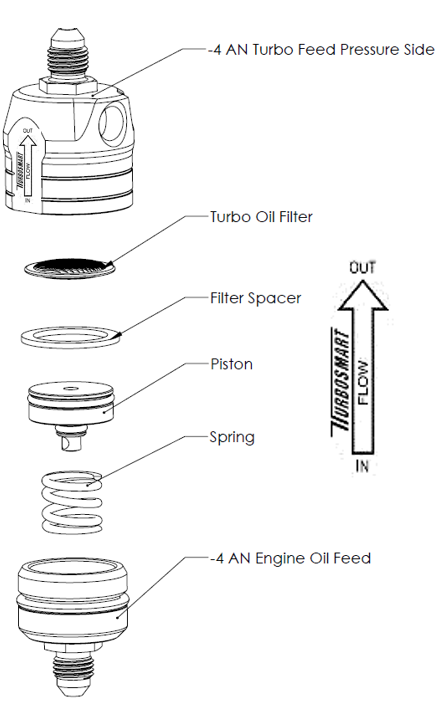
To Reassemble we can follow the exploded view below. Having the cap upside down the filter, spacer and position can be stacked to ensure components sit in the correct position before spring and body is screwed together.
CAUTION! Failure to ensure filter, spacer and piston sit concentric to each other within the cap may result in the assembly not being correctly seating and may affect regulation pressure and induce leaks.
The OPR must be torqued to 12Nm (8.8.lb.ft.)
The filter should be refitted in the same orientation. The Clean side should always face the turbo.
Replacement Filter
TS-0801-3001 | TS OPR V2 Rebuild Kit Inc Filter 44 micron |
TS-0804-3002 | TS Turbo Oil Filter Element Replacement 44 micron |
Troubleshooting
- OPR Leaking – Check fittings are tight and o-rings are present or not damaged.
- OPR regulating below 35psi (241kPa) – Ensure engine oil pressure is above 45psi, the OPR will not regulate until inlet pressure exceeds 45psi. OPR will revert to full flow if inlet pressure is below regulation pressure.
- OPR regulating above 50psi (345kPa) – Ensure oil path to turbo is not blocked causing a pressure build up in your regulator.
- Failing the above, submit a technical request to [email protected] with information of your engine, oil type and photos of installation