TS-0223-1292 - EM Series Diverter Valve VR9Updated 25 days ago
Product Name: | EM Series Diverter Valve |
Product Description: | EM Series Diverter Valve VR9 |
Product Number: | TS-0223-1292 |
Important Notes on Your New Diverter Valve
- Turbosmart accepts no responsibility whatsoever for incorrect installation of this product which is potentially hazardous and can cause serious engine damage or personal injury
- The EM series diverter valve is designed for use as a factory replacement for a turbocharged vehicle that utilises an electronic diverter valve, this valve can be used on other applications so long as there is a control signal to actuate the diverter valve.
- Ensure the engine is cold prior to installation.
- For Standalone ECU configuration, ensure valve is not energised for indefinite periods of time as this can cause significant life detriment to the actuation solenoid.
- Recommendations
Turbosmart recommends that your Diverter valve is fitted by an appropriately qualified technician

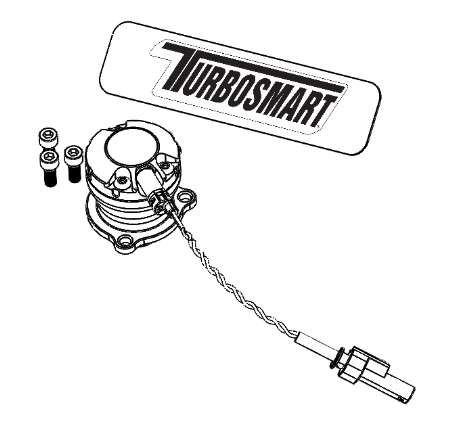
Kit Contents
| Part | Description | Use |
| 1 | Turbosmart EM Series Diverter | Main Unit |
| 2 | M6 Allen Bolts | Mounts Diverter valve to compressor cover |
| 3 | Turbosmart Sticker | Turbosmart Sticker |
Tools Required
- Allen key set metric
- Screwdriver
- Basic socket set
- E14 Socket Torx bits
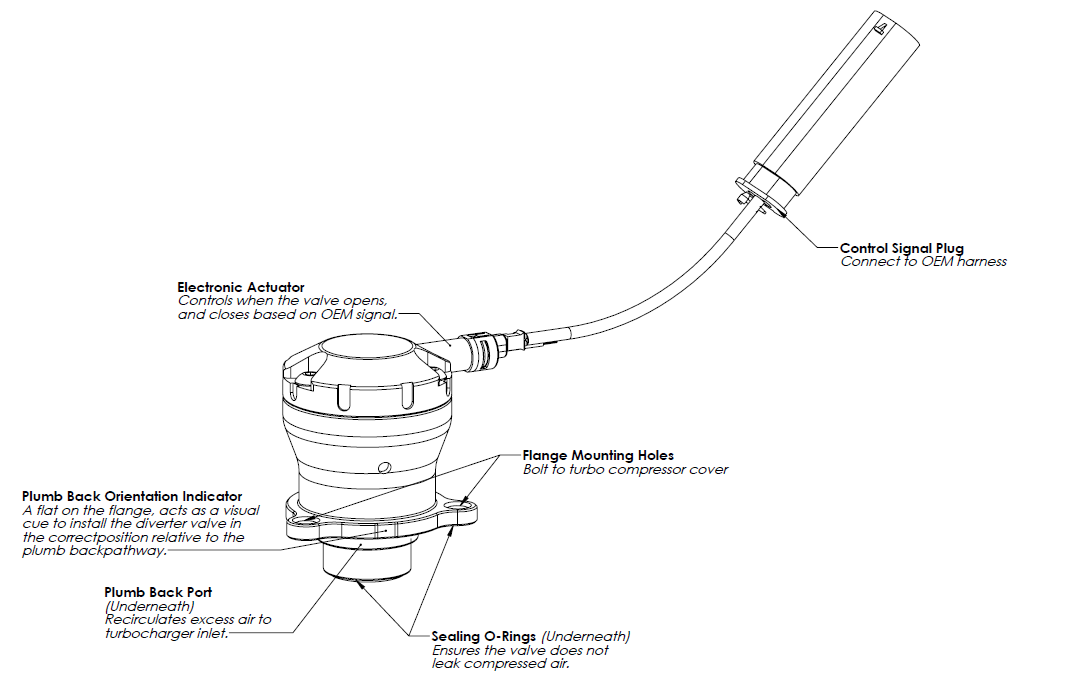
About Your EM Series Diverter Valve
Fitting your EM Series Diverter Valve
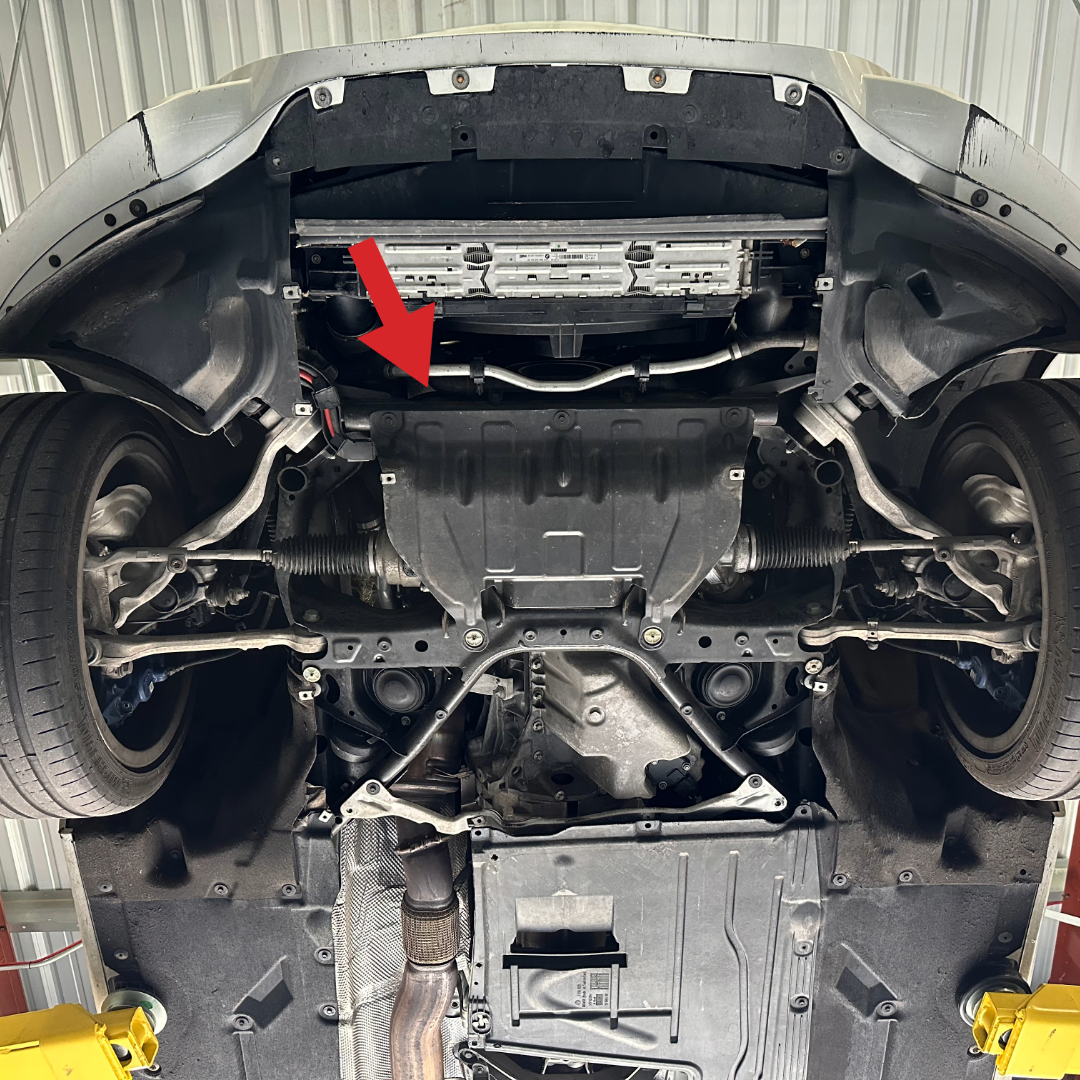
Identify diverter valve location
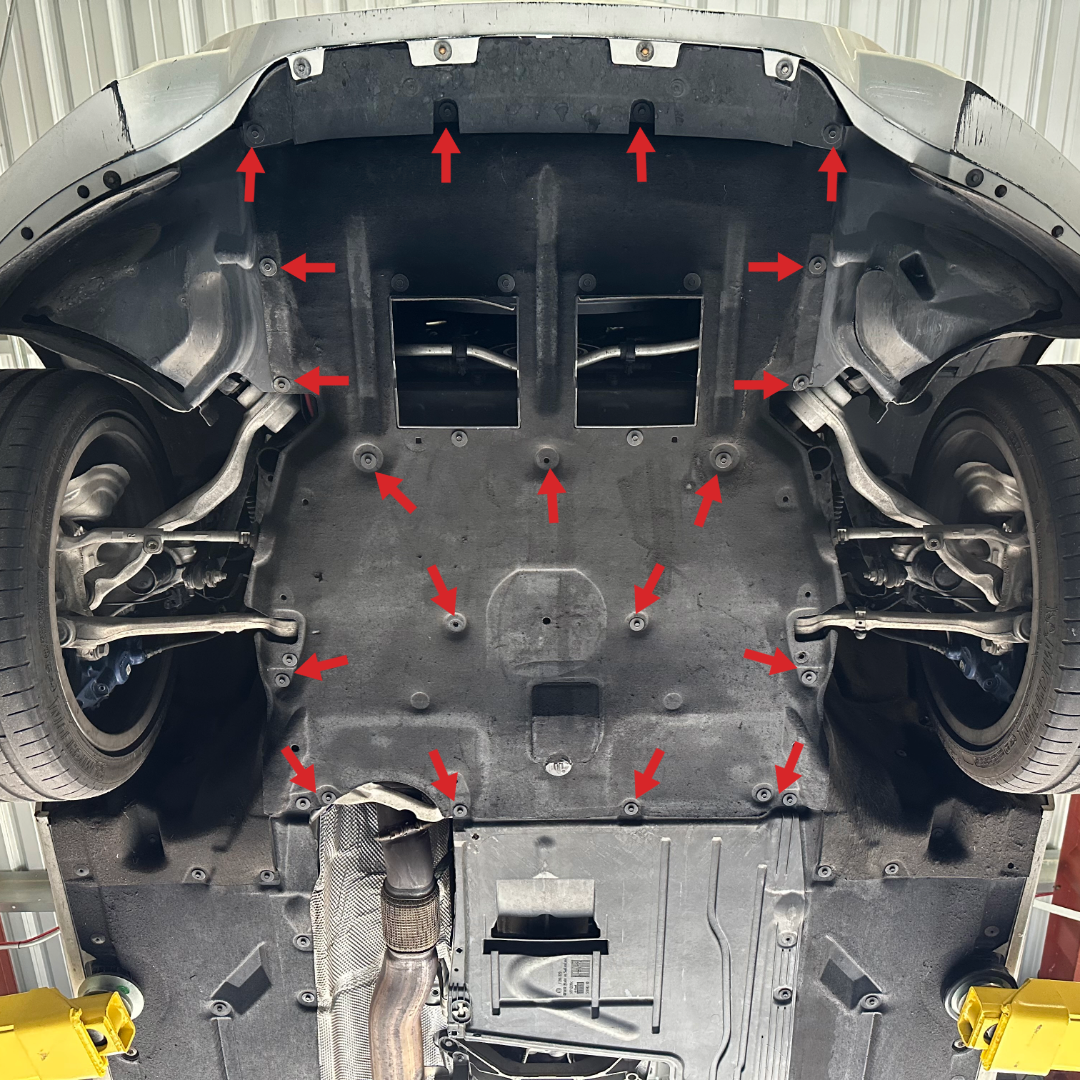
NOTE! Cosmetic engine covers may be required to be removed prior to the turbocharger assembly being visible.
CAUTION! The turbocharger assembly may require the vehicle to be raised on a hoist or jacked up and secured using vehicle jack stands, ensure your safety is not compromised. Identify OEM diverter valve location
NOTE! Allow for the engine to cool down.
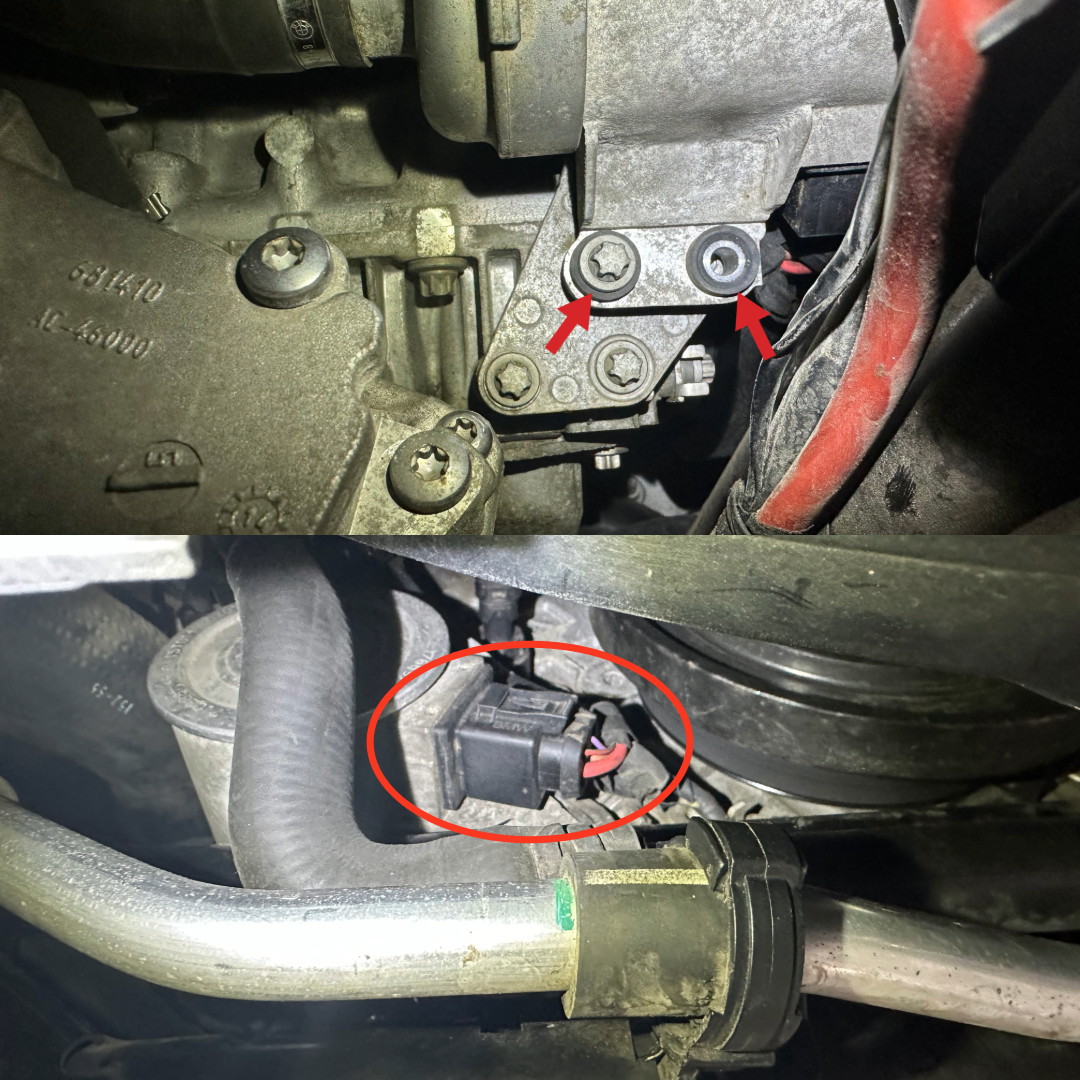
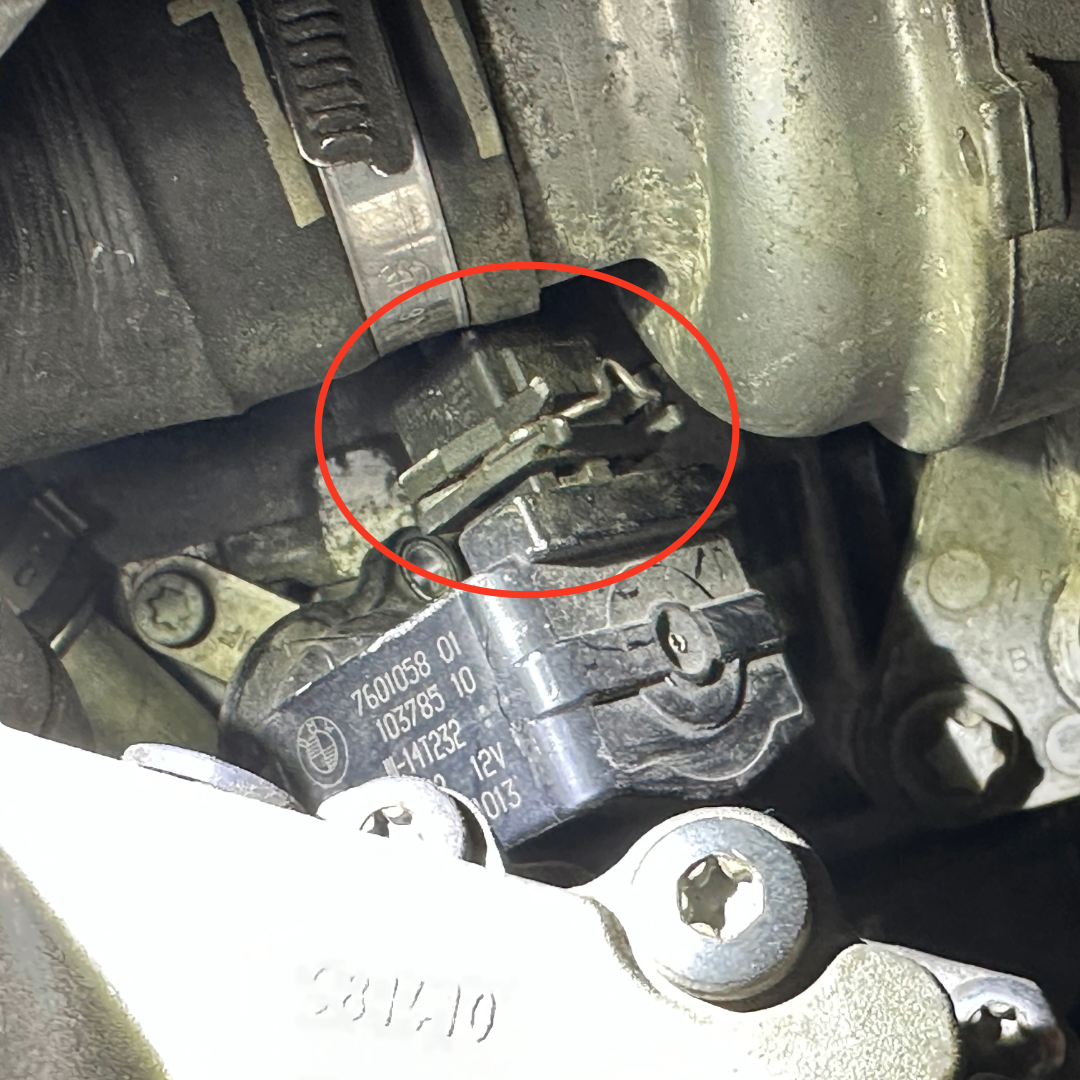
Disconnect Water Pump connector
In order to make room to remove the OEM diverter valve, the water pump connector must be unclipped.

Removing the Water Pump Mount
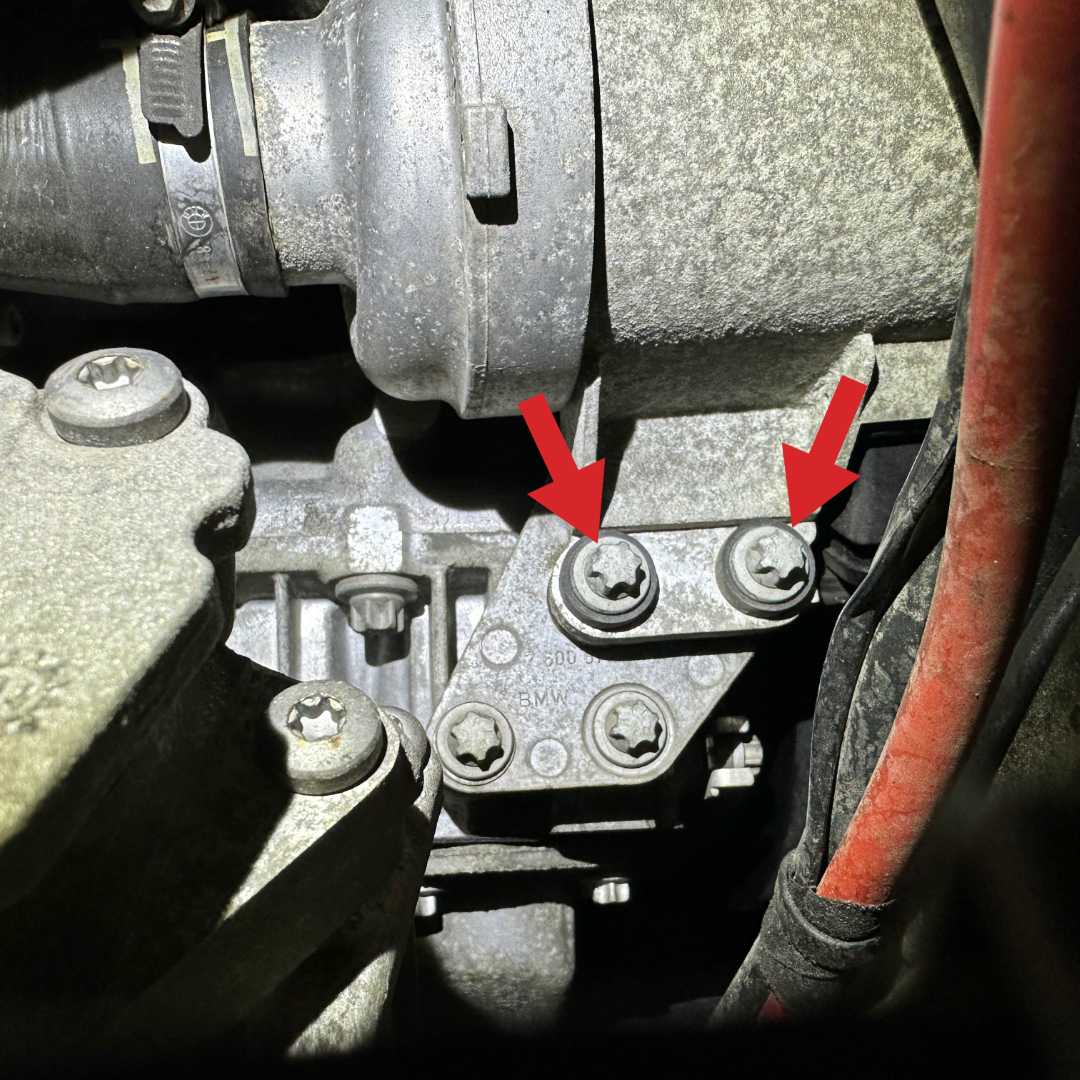
Note: The factory torx screw can be reused or the included M6 fasteners.
Removing the Diverter Valve
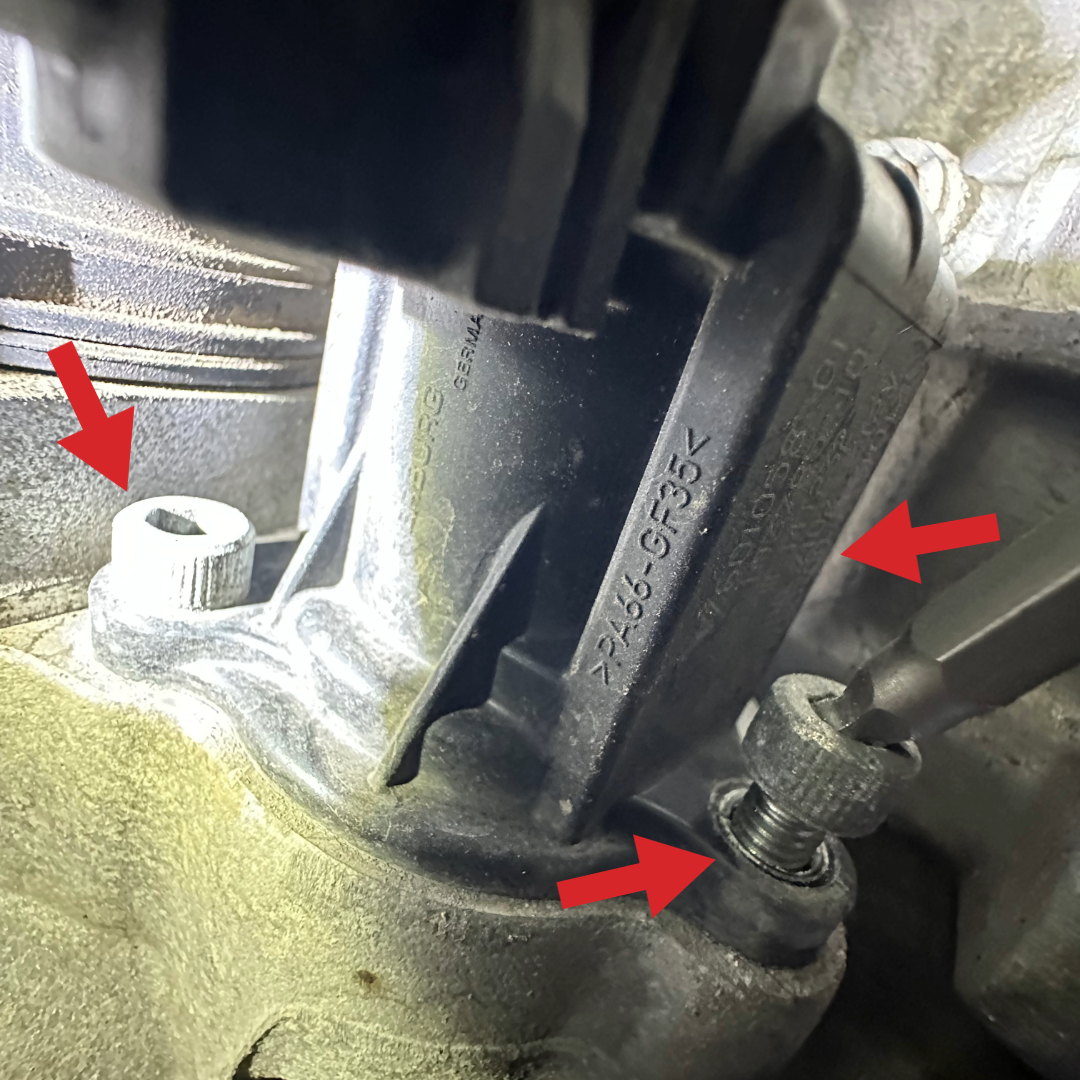
Removing the Diverter Valve
Installing Turbosmart VR9 Valve
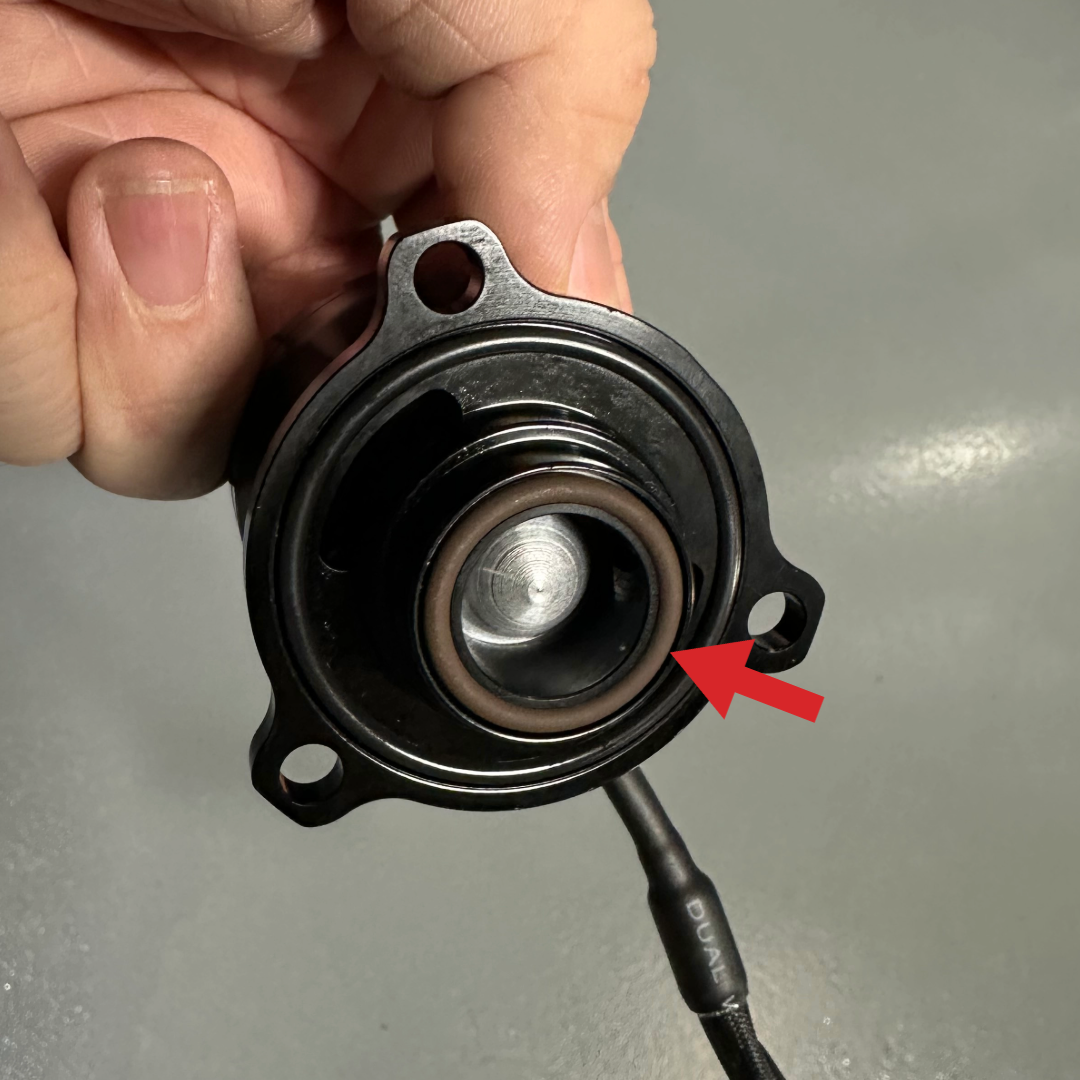
Before installing the Turbosmart VR9 Valve, make sure to check that both mounting O-rings are in place on the valve. Pay special attention to the smaller of the two as it is crucial to the valve’s operation.
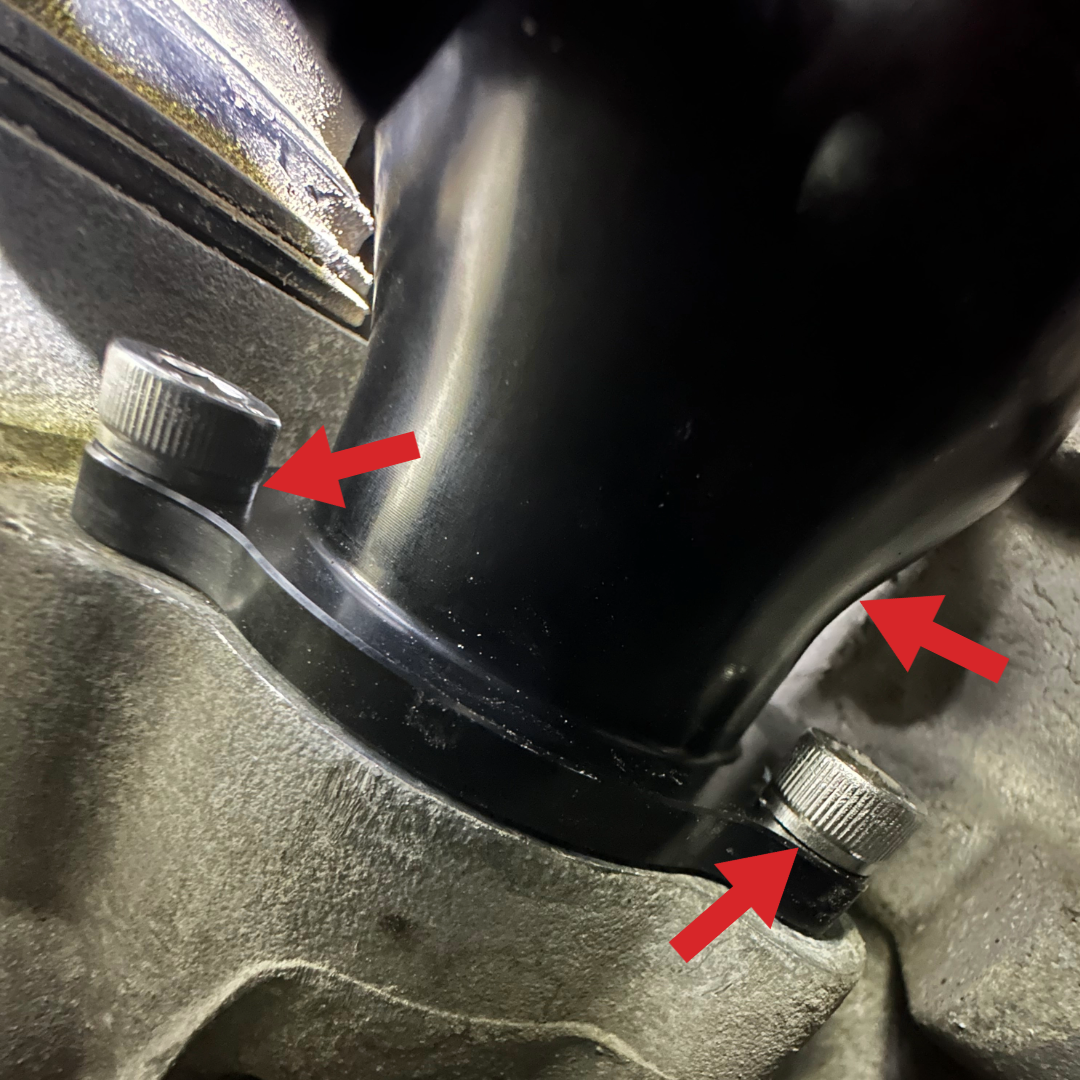
Insert the valve into place on the factory turbocharger. Secure it in place with the three (3) screws provided with the Turbosmart VR9 Valve.
Plug the factory connector into the Turbosmart VR9’s solenoid assembly. Secure it with the retaining clip.

Resecure the water pump into place with the three (3) E14 bolts and plug in the water pump connector.