TS-0203-1036 - BOV Kompact Hyundai i30N, Kona N & Veloster NUpdated 25 days ago
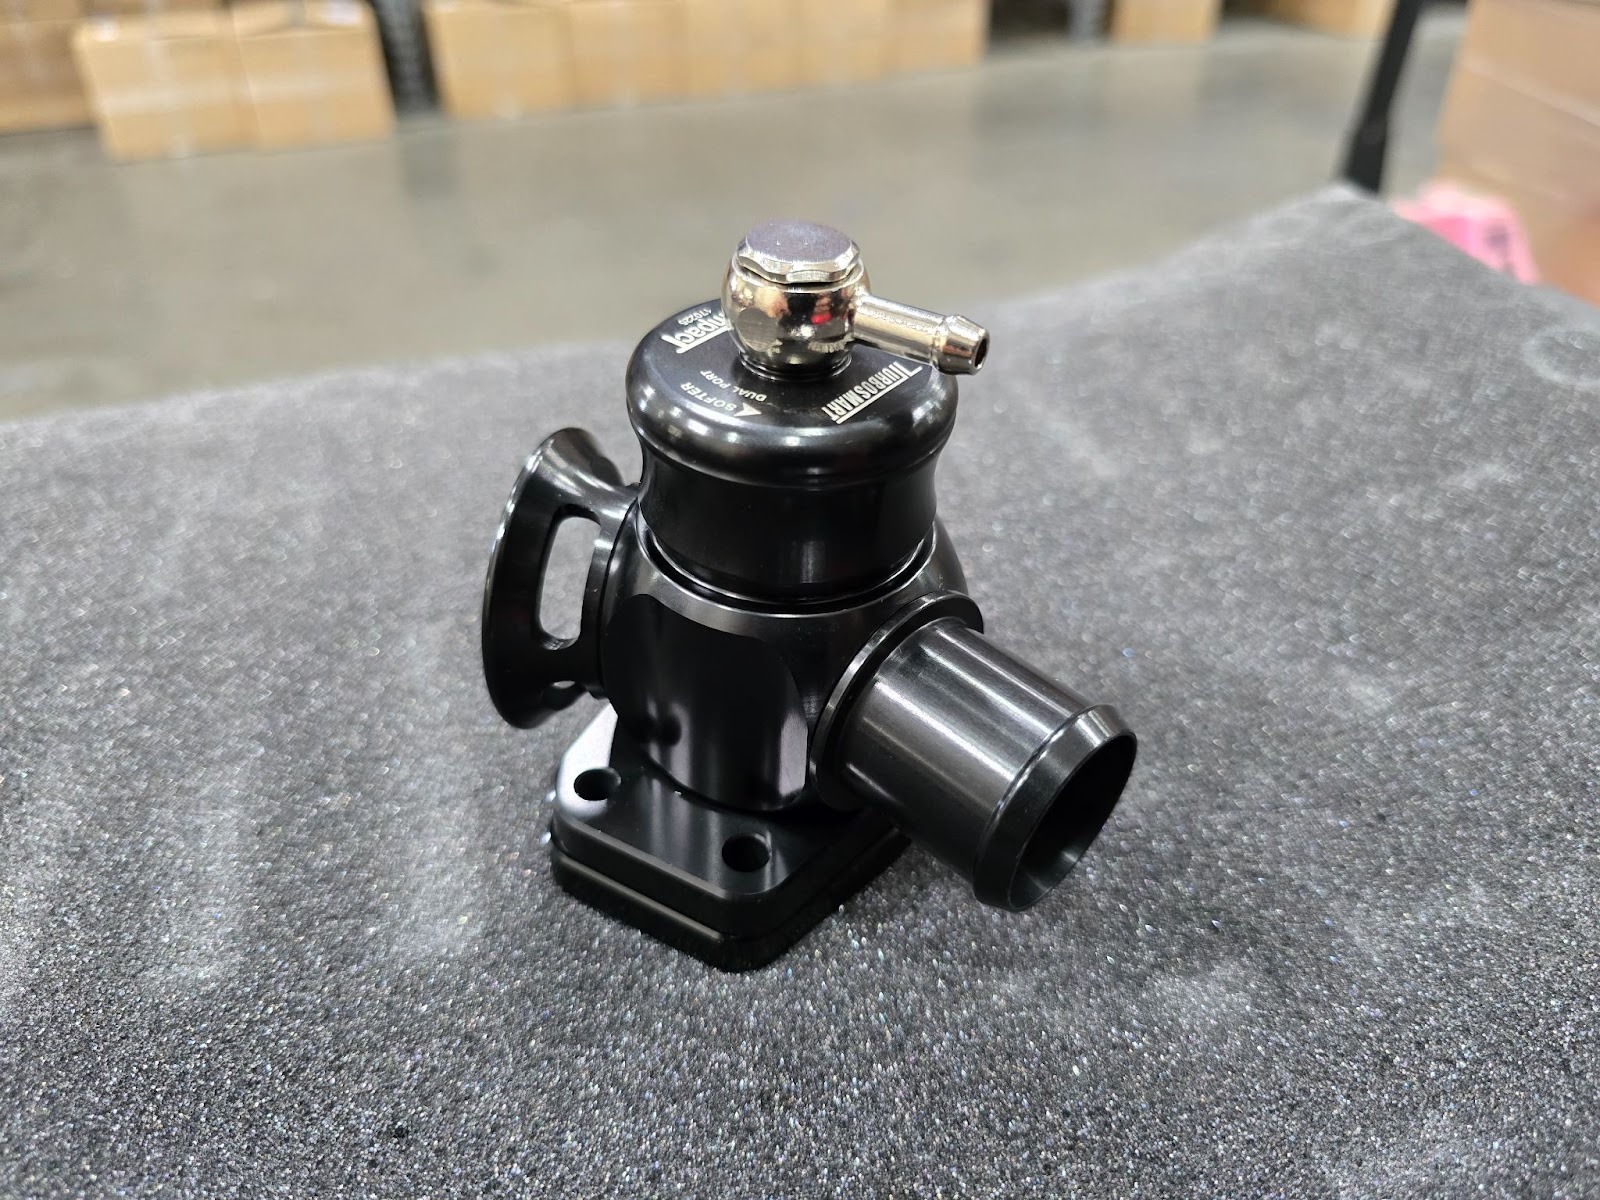
Product Name: | Kompact Blow Off Valve |
Product Description: | Kompact Dual Port Blow Off Valve Suit Hyundai I30 |
Product Number: | TS-0203-1036 |
Important Notes On Your New Diverter Valve
- Turbosmart accepts no responsibility whatsoever for incorrect installation of this product which is potentially hazardous and can cause serious engine damage or personal injury
- The EM series diverter valve is designed for use as a factory replacement for a turbocharged vehicle that utilises an electronic diverter valve, this valve can be used on other applications so long as there is a control signal to actuate the diverter valve.
- Ensure the engine is cold prior to installation.
Recommendations
- Turbosmart recommends that your Diverter valve is fitted by an appropriately qualified technician.
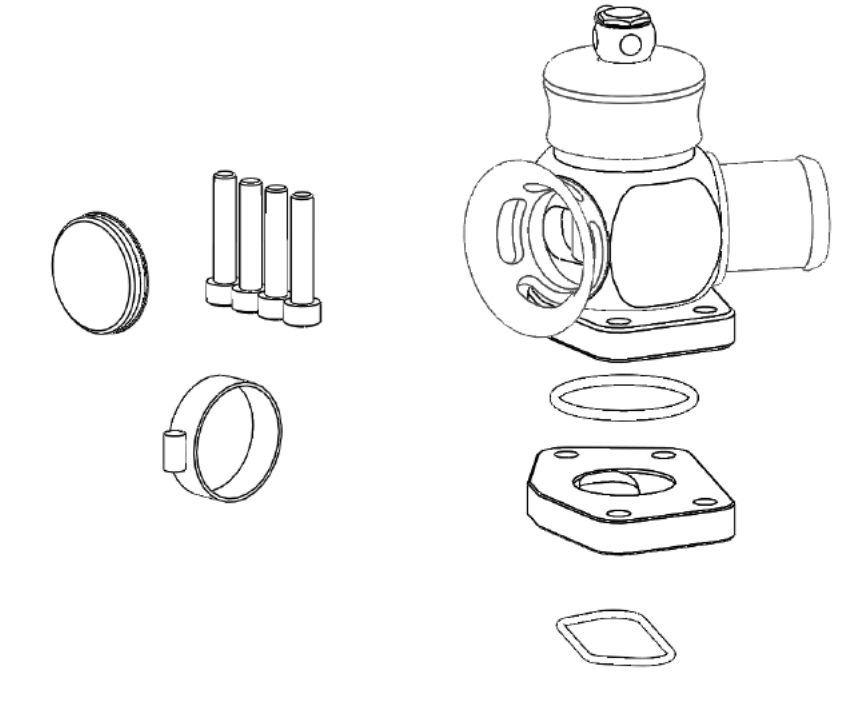
Kit Contents
Part | Description | Use |
1 | Turbosmart EM Series diverter valve | Main unit |
2 | Mounting Brackets | Mounting diverter valve to intercooler x 2 Model dependent |
3 | Turbosmart Sticker | Turbosmart sticker |
4 | Hose | Connect BOV to Signal Source |
Tools Required
- Flat Headed Screwdriver
- 5mm Ball Head Allen Socket or Key
- 10mm Deep socket OR Phillips Screwdriver
- Socket Wrench
- Socket Wrench Extension
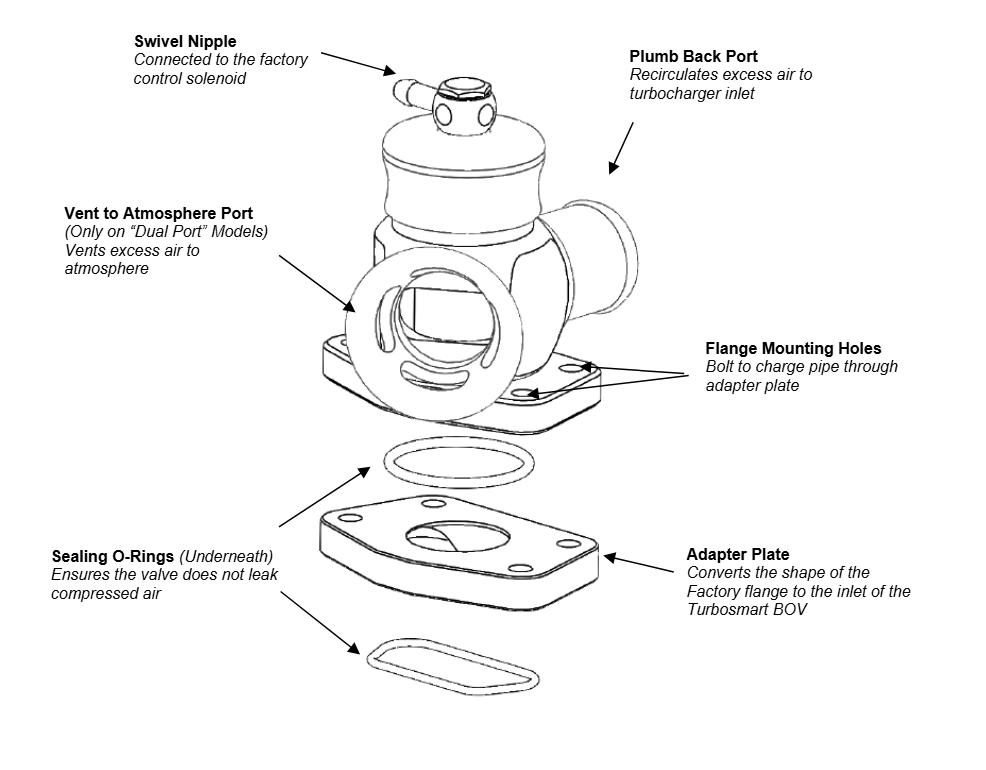
About Your Kompact Series BOV
- Direct fit upgrade for the factory BOV on Hyundai GDIT 2.0 i4 Turbo Engines
- All billet CNC construction and attractive anodized finish
- Manufactured, assembled and validated in-house at Turbosmart HQ
Fitting your Kompact Series Diverter Valve
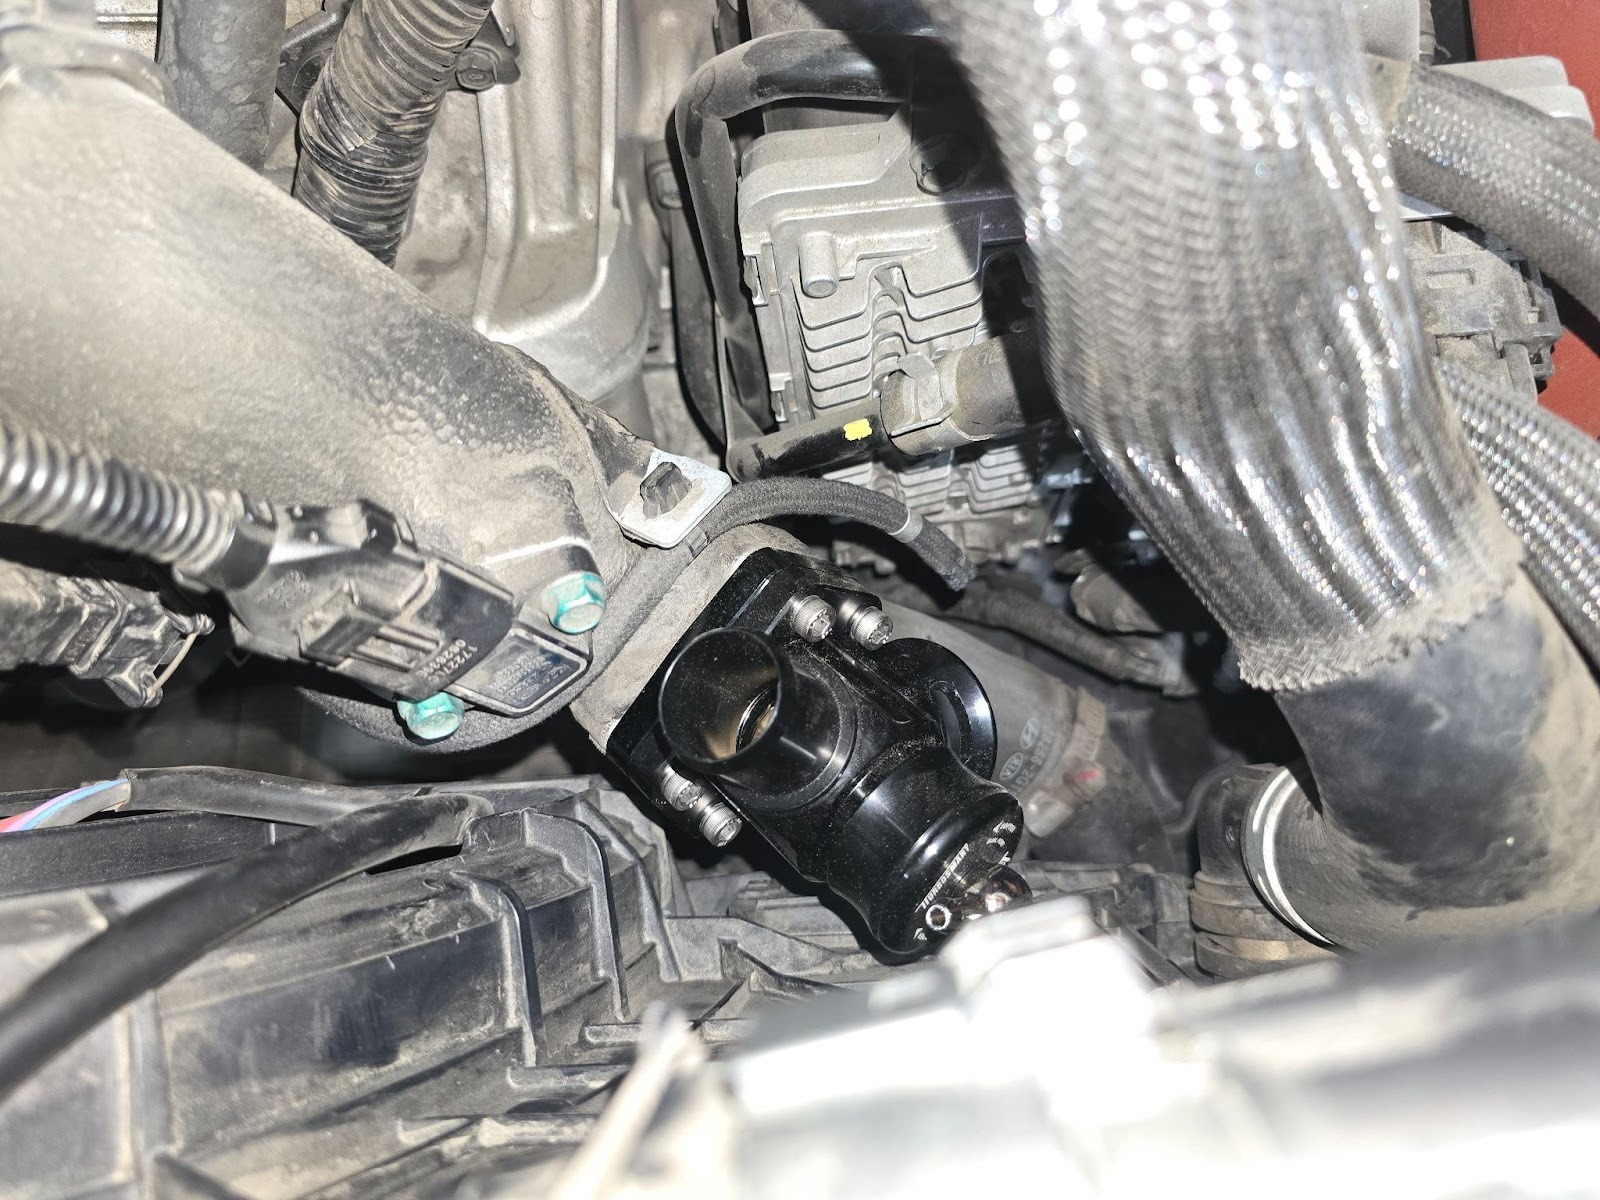
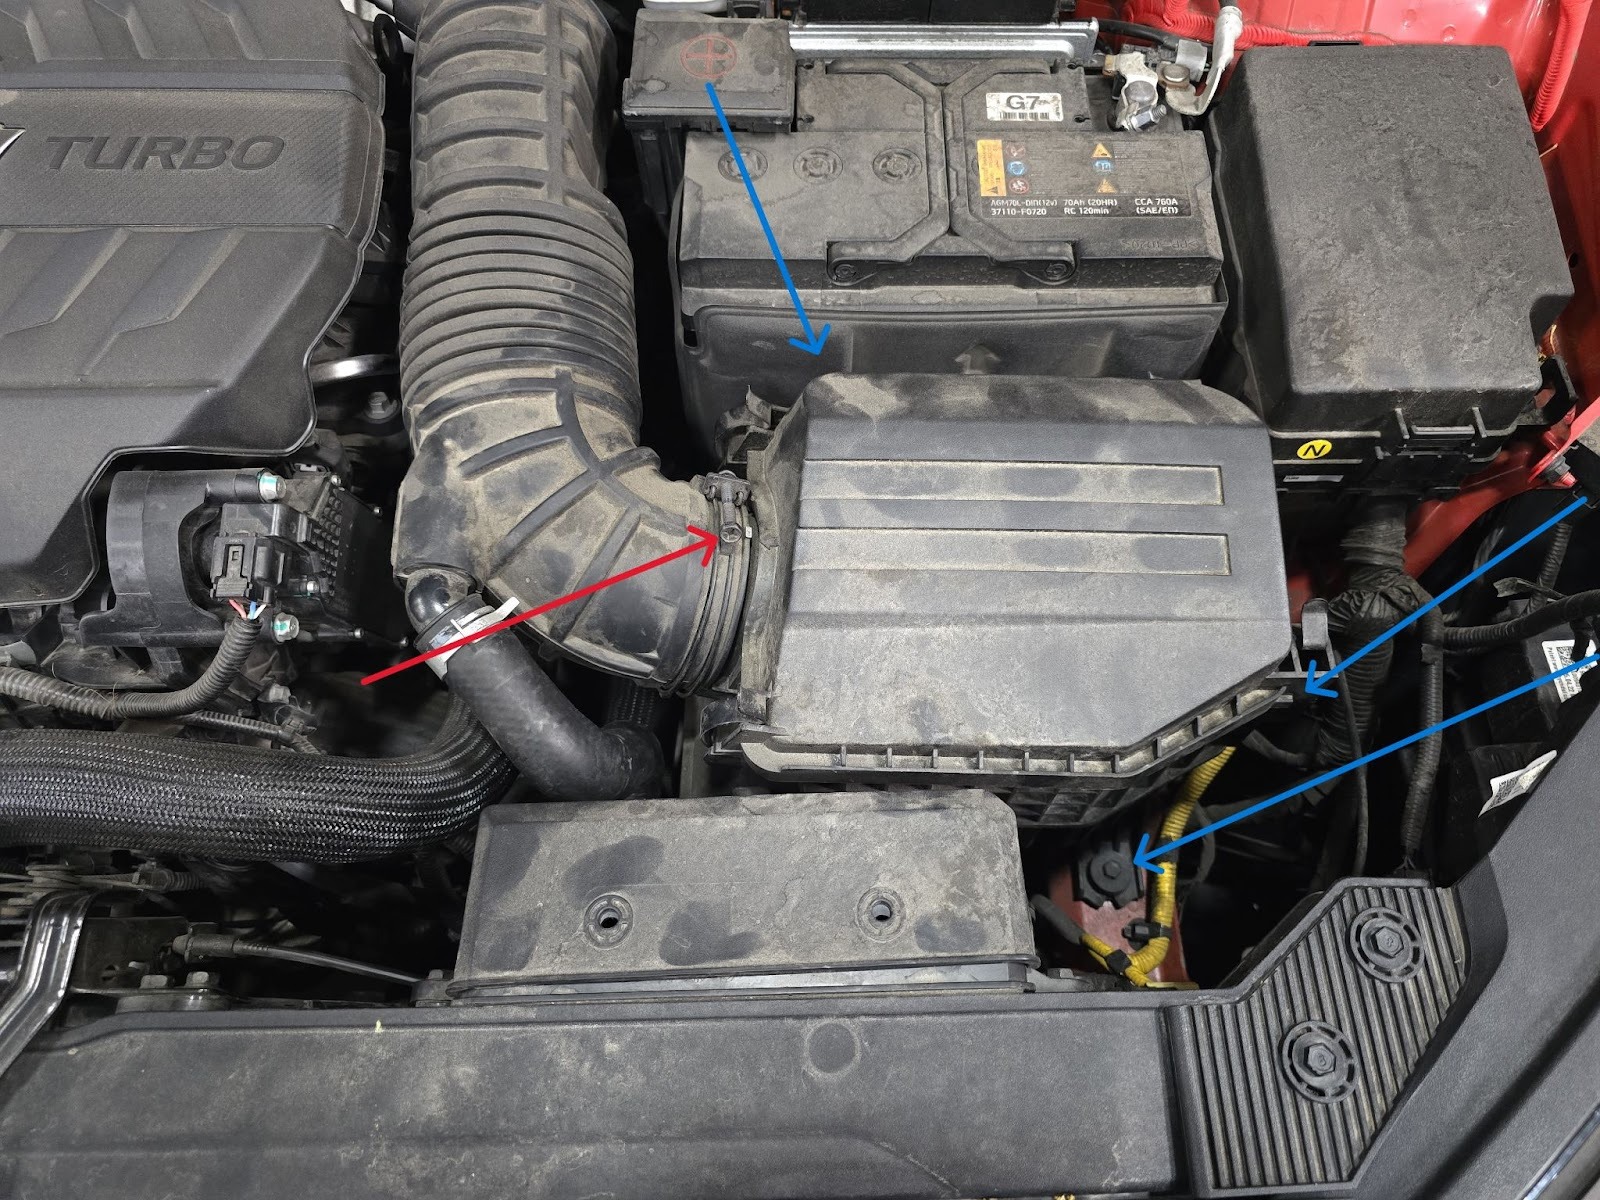
Identify diverter valve location
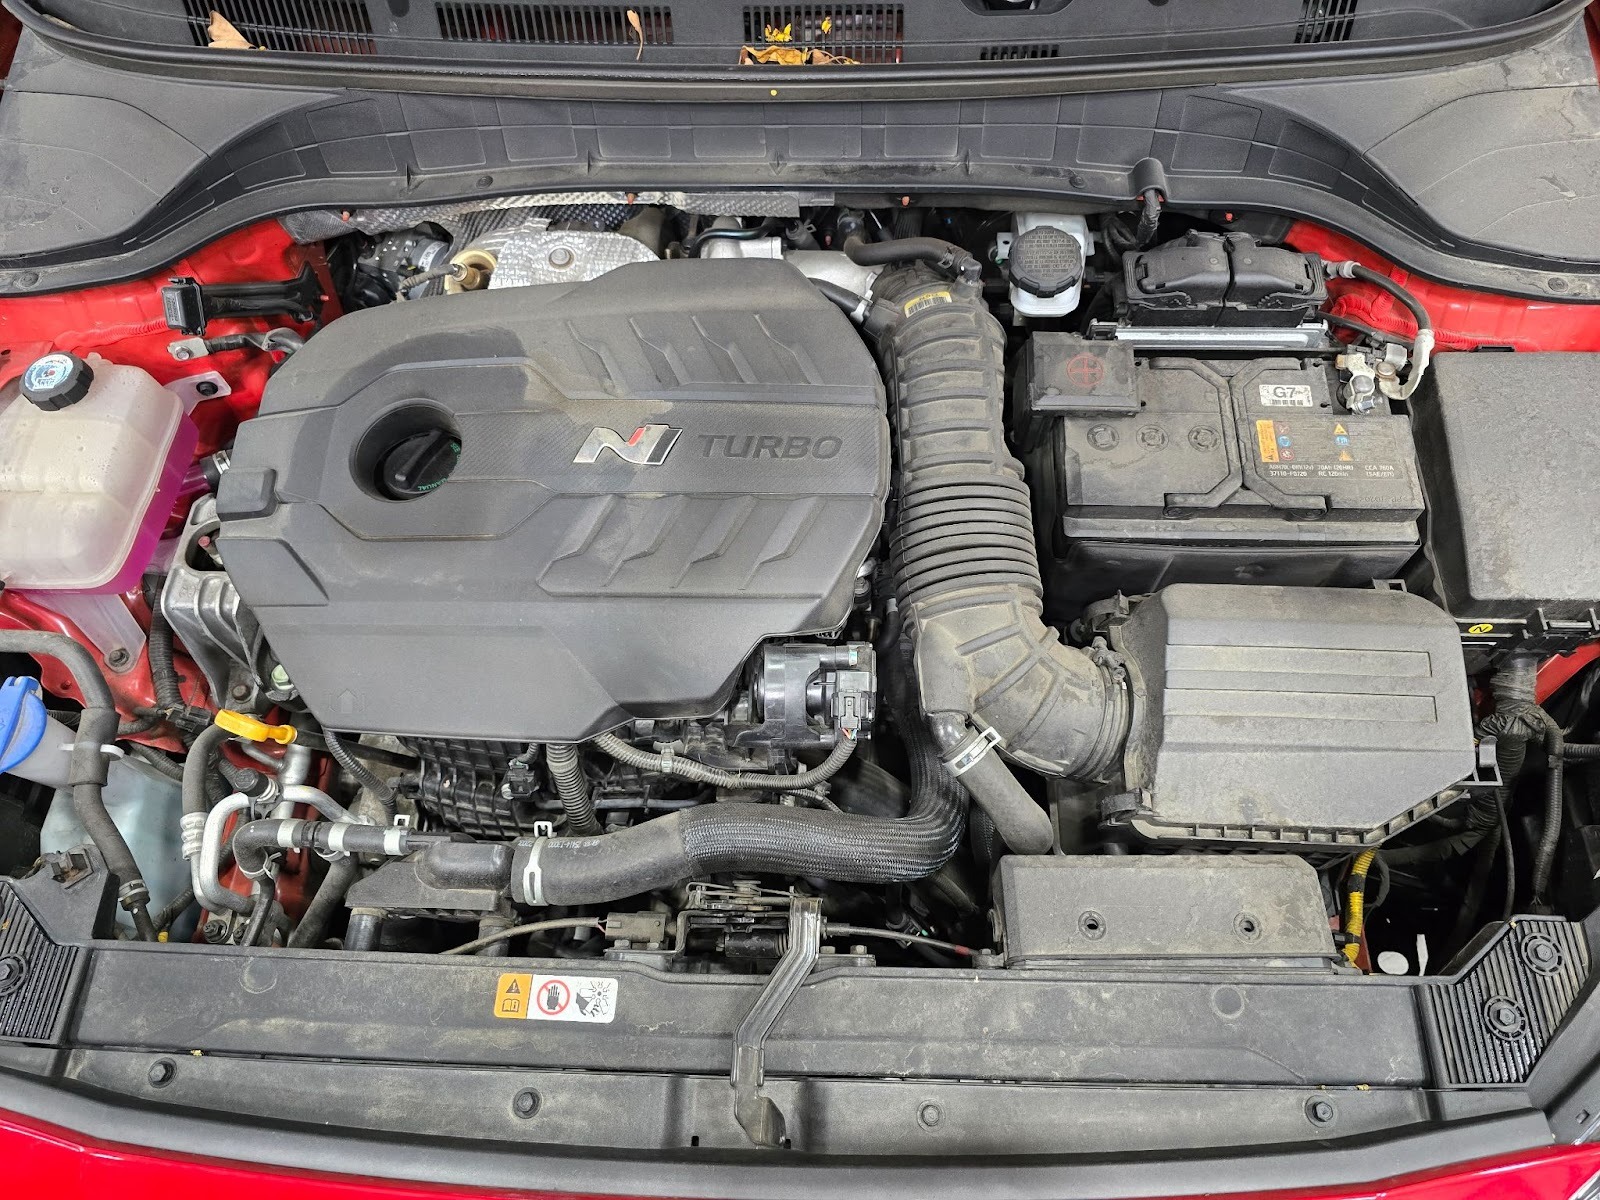
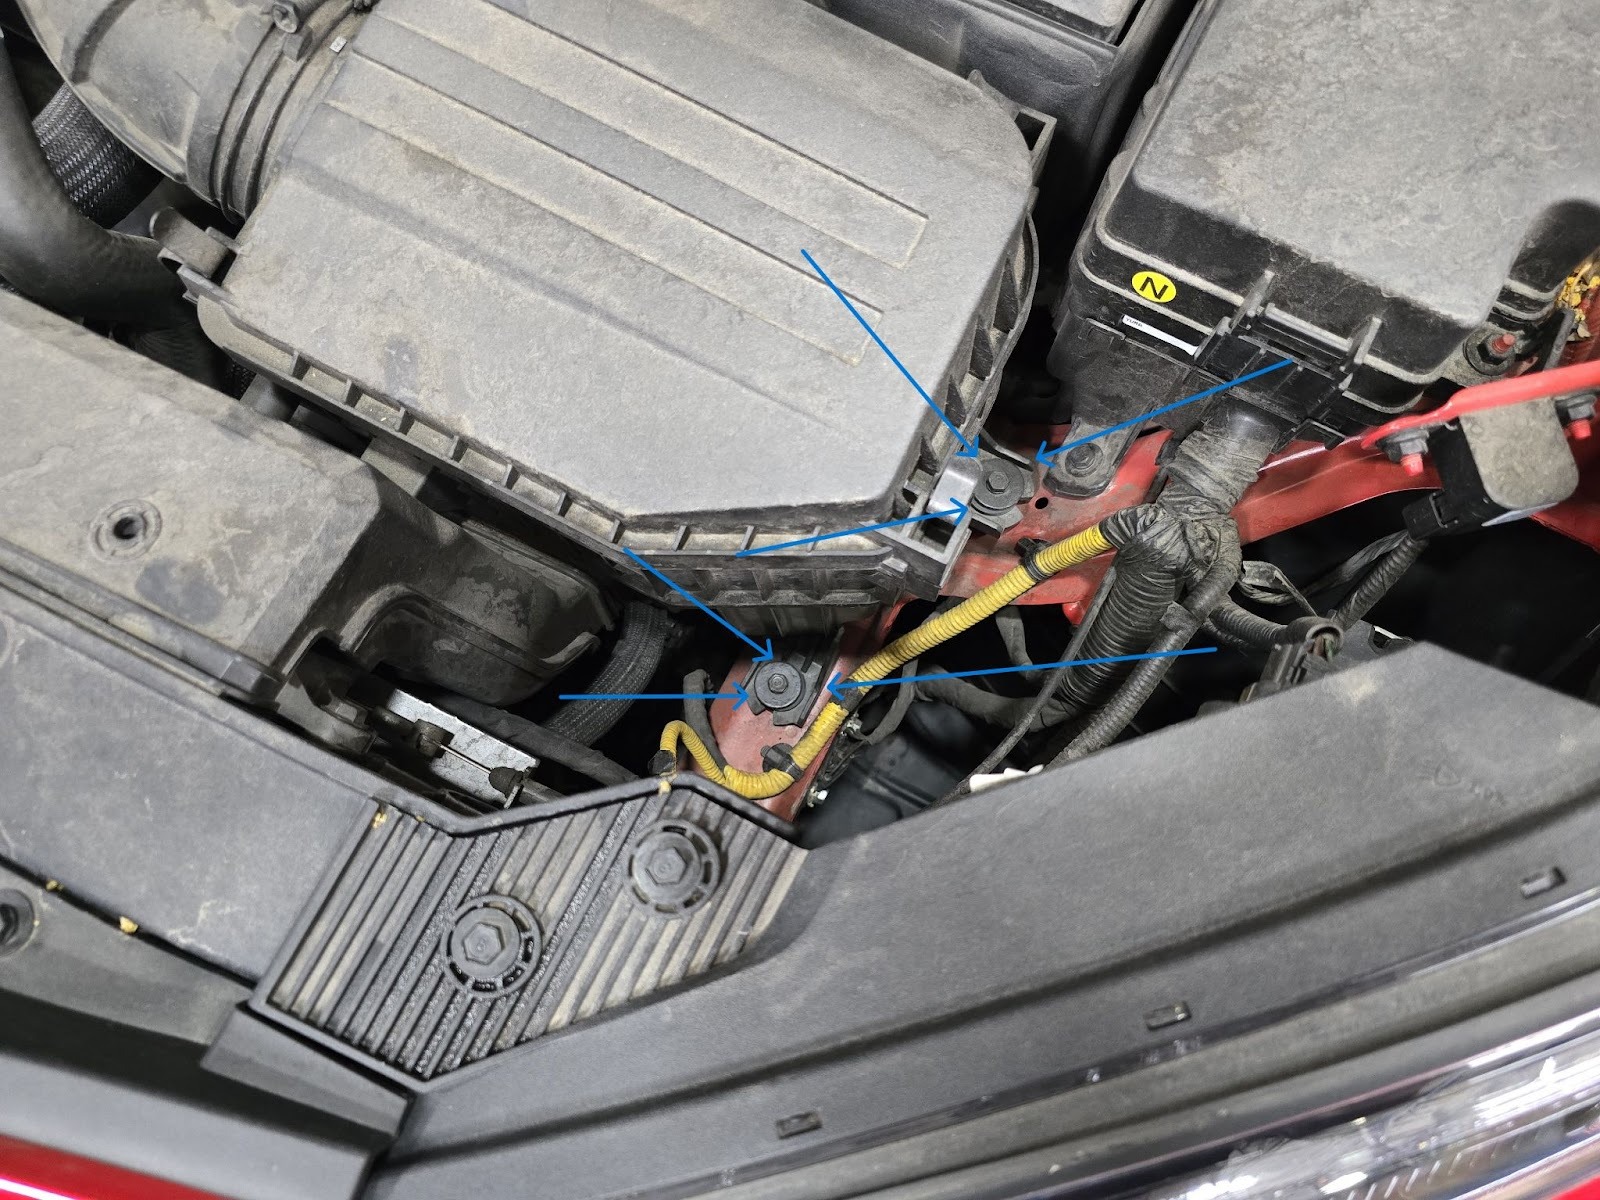
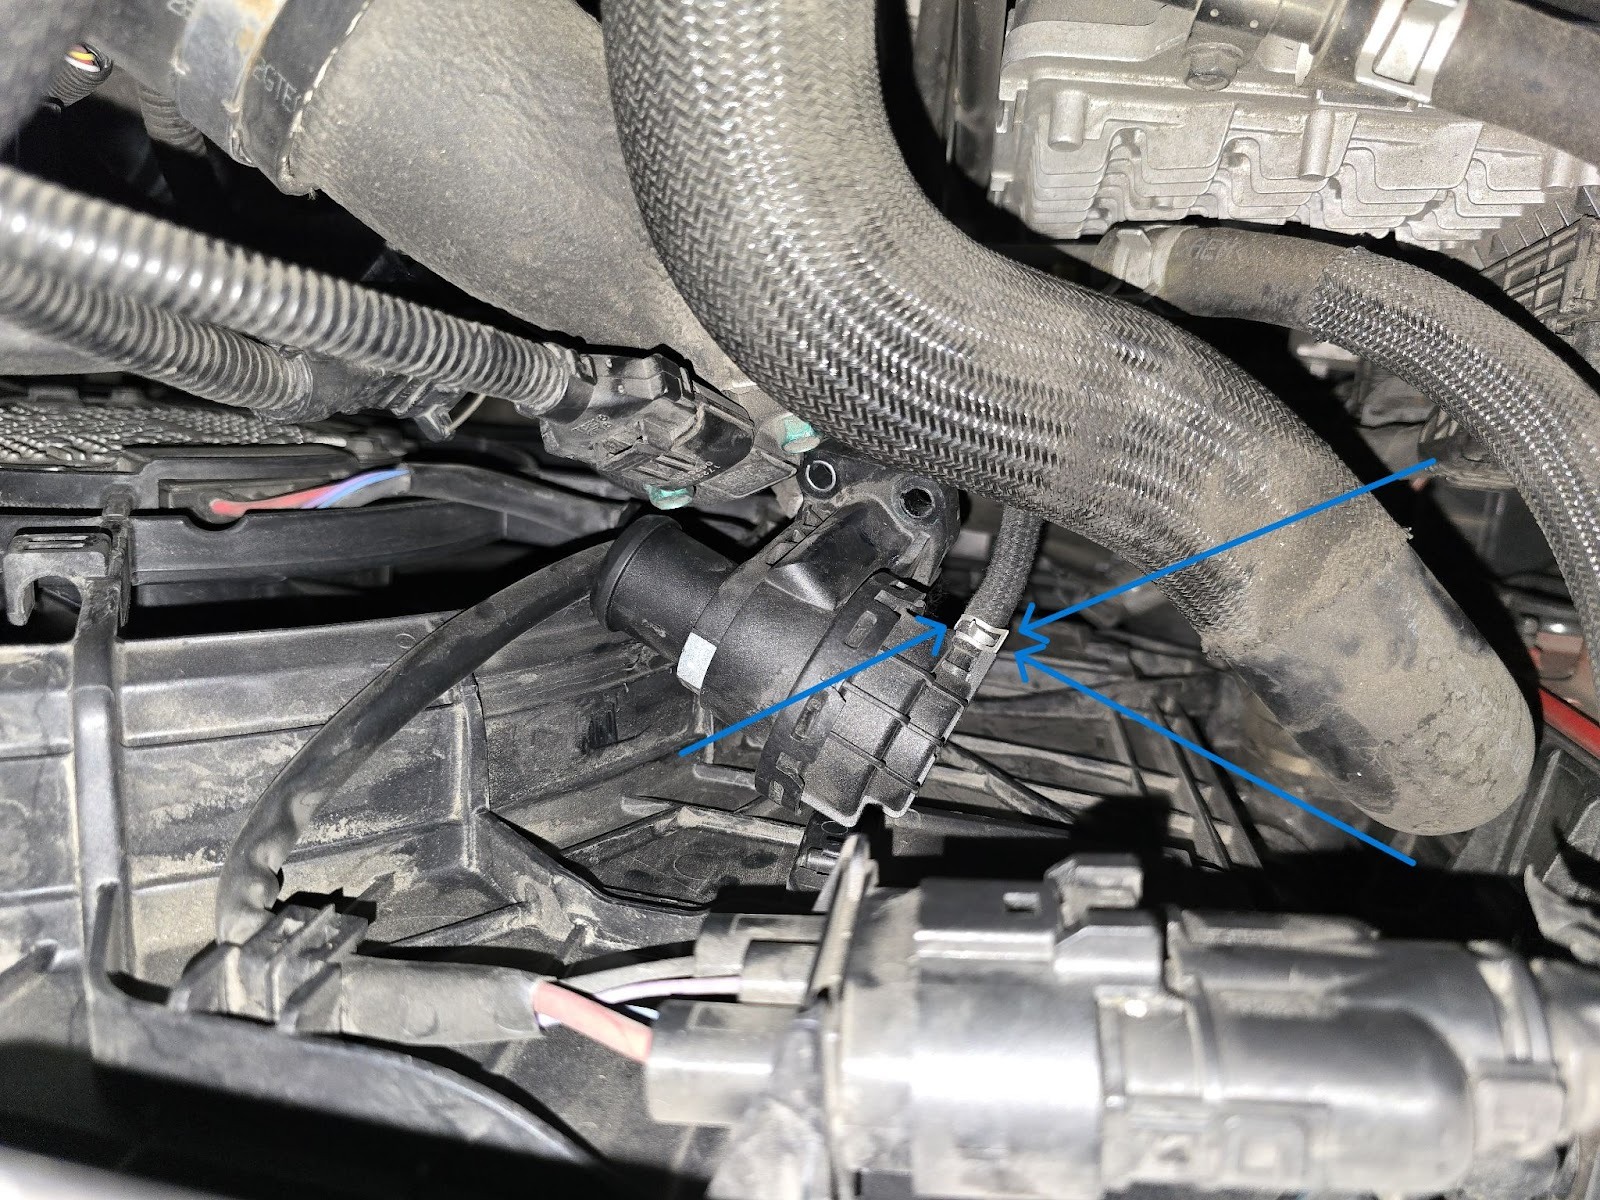
Removing OEM airbox
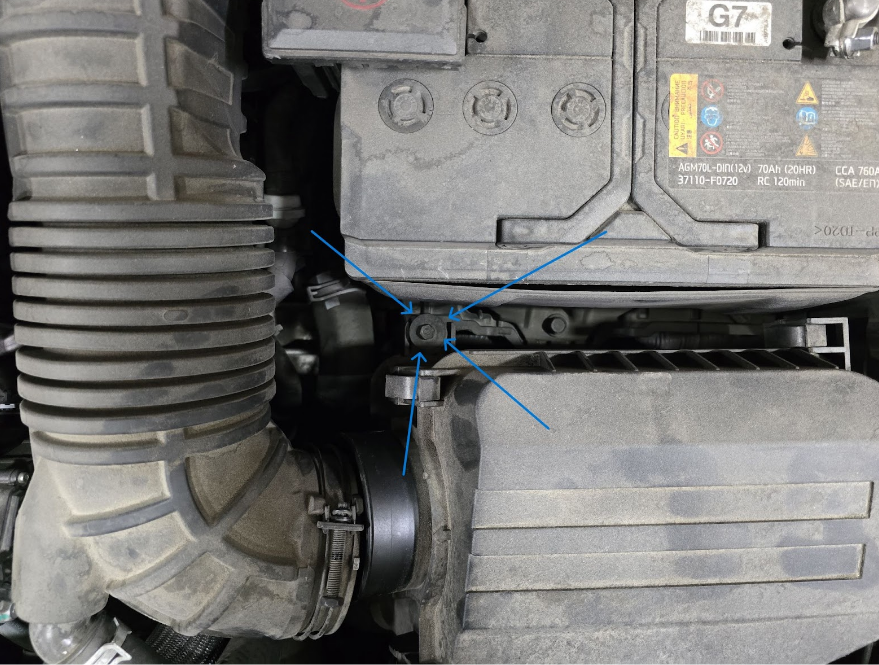
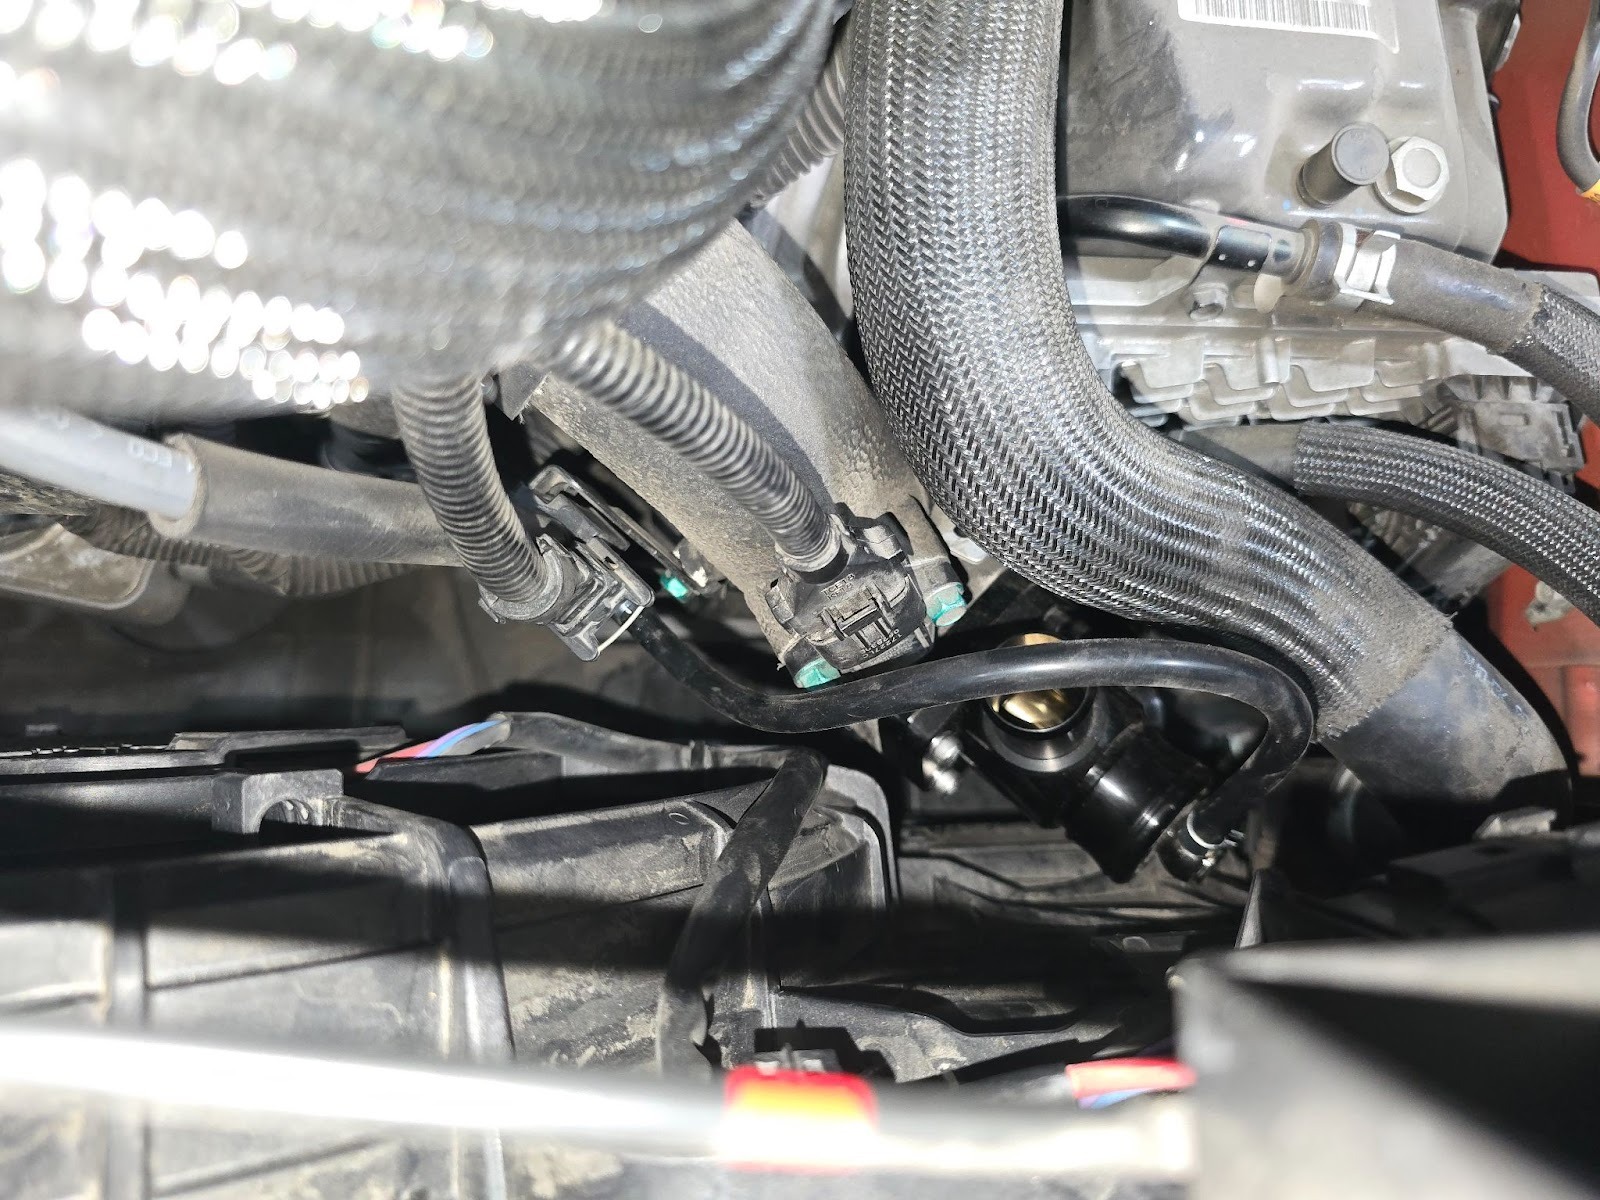
The Hose clamps with a 10mm and use some pliers to remove the spring hose clamp from the recirculation hose.
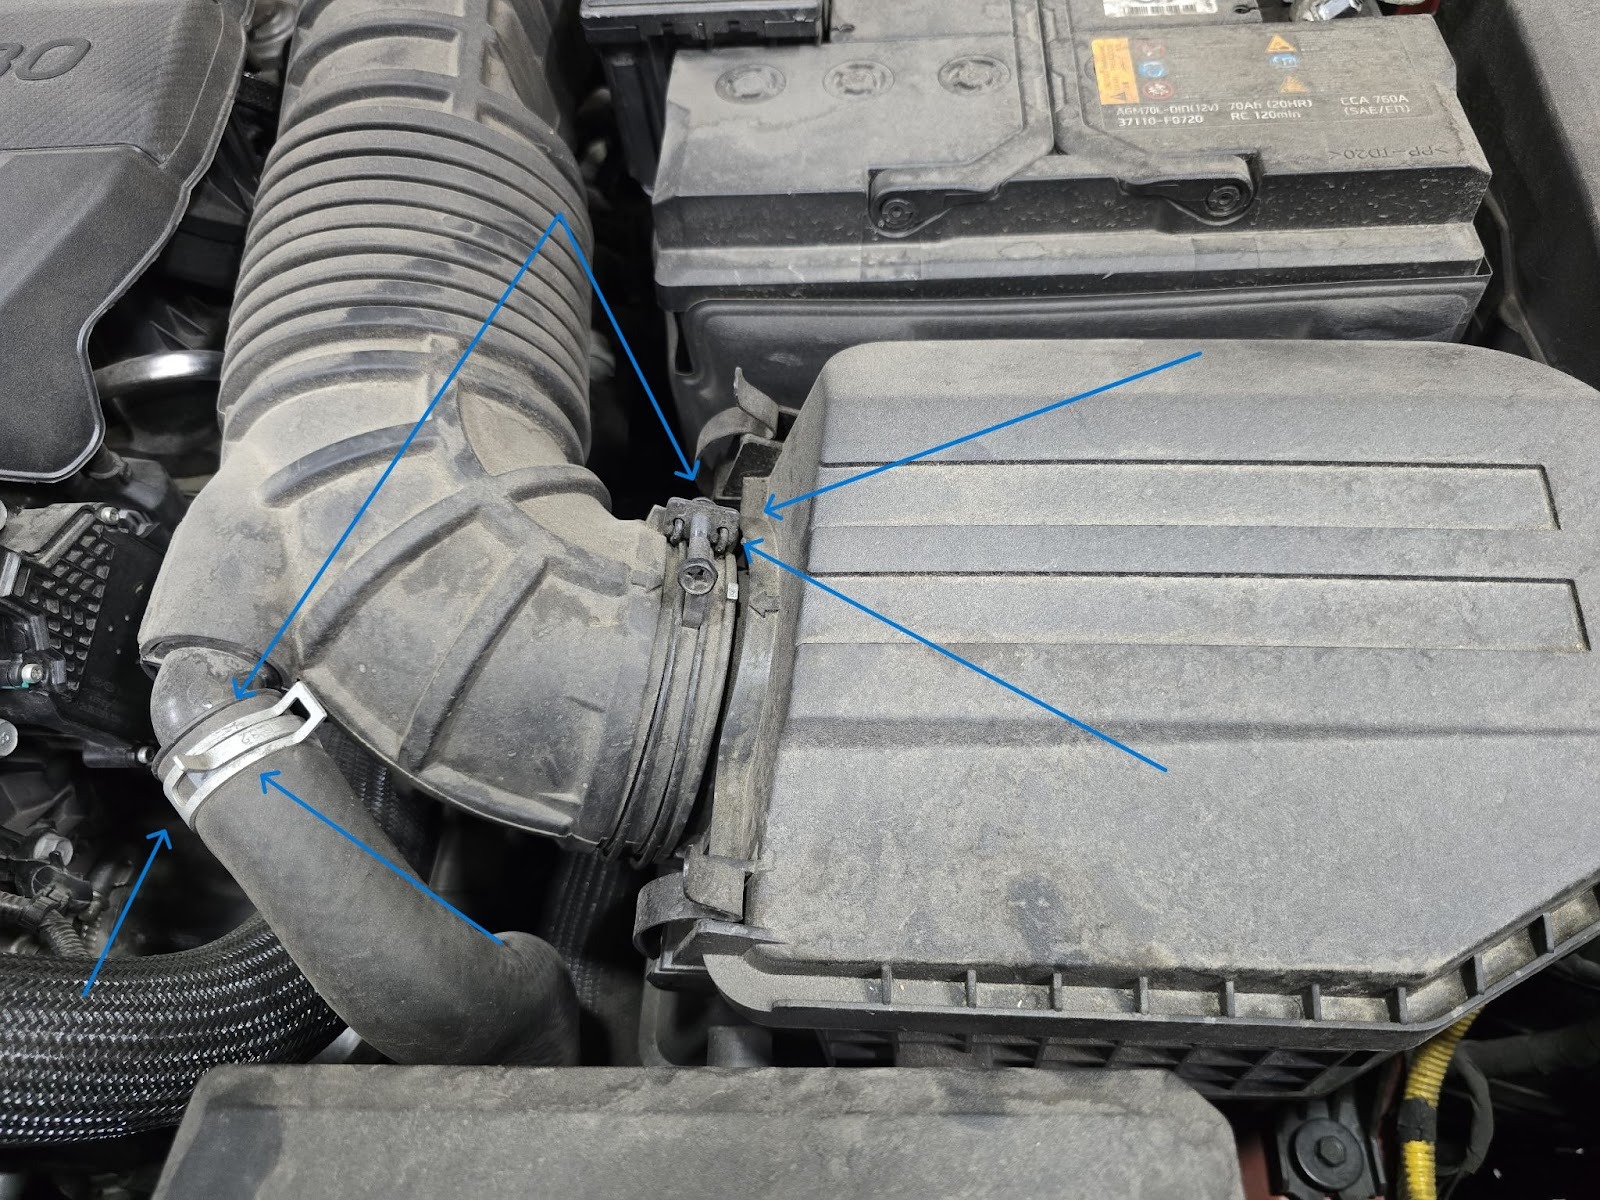
Removing Recirculation hose
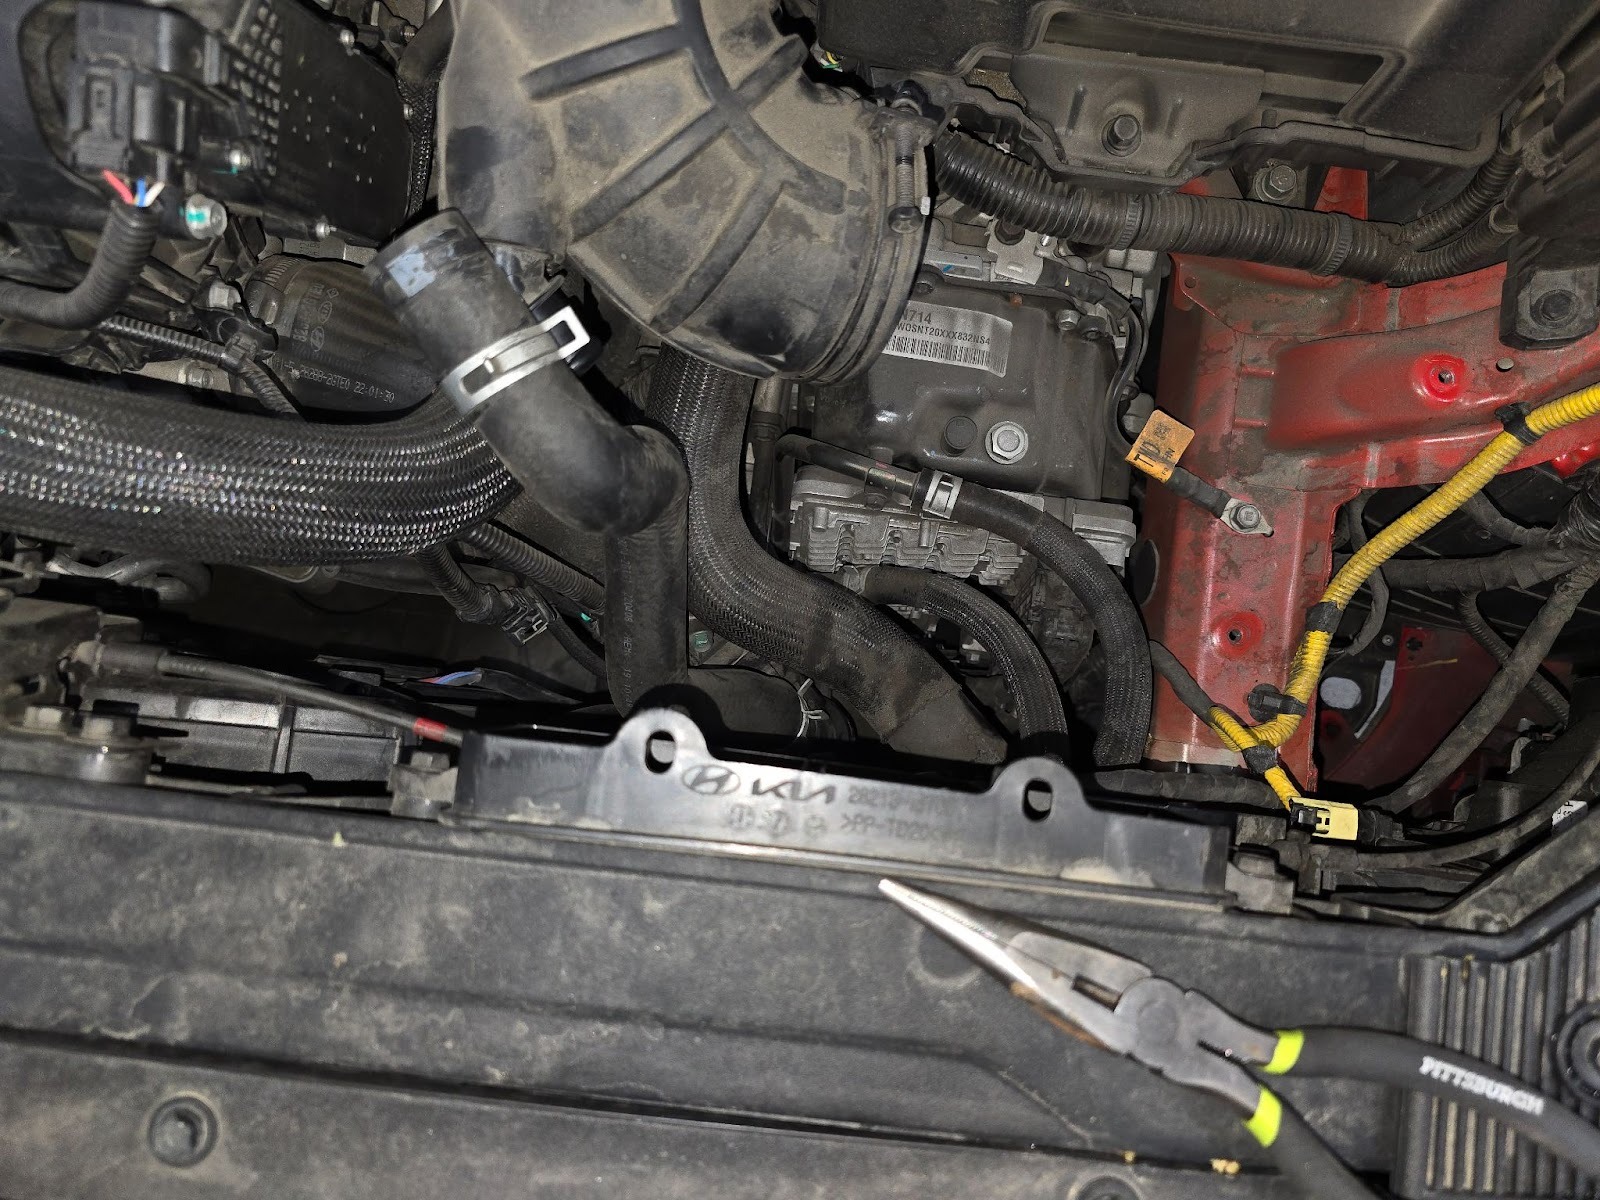
Removing OEM Diverter Valve
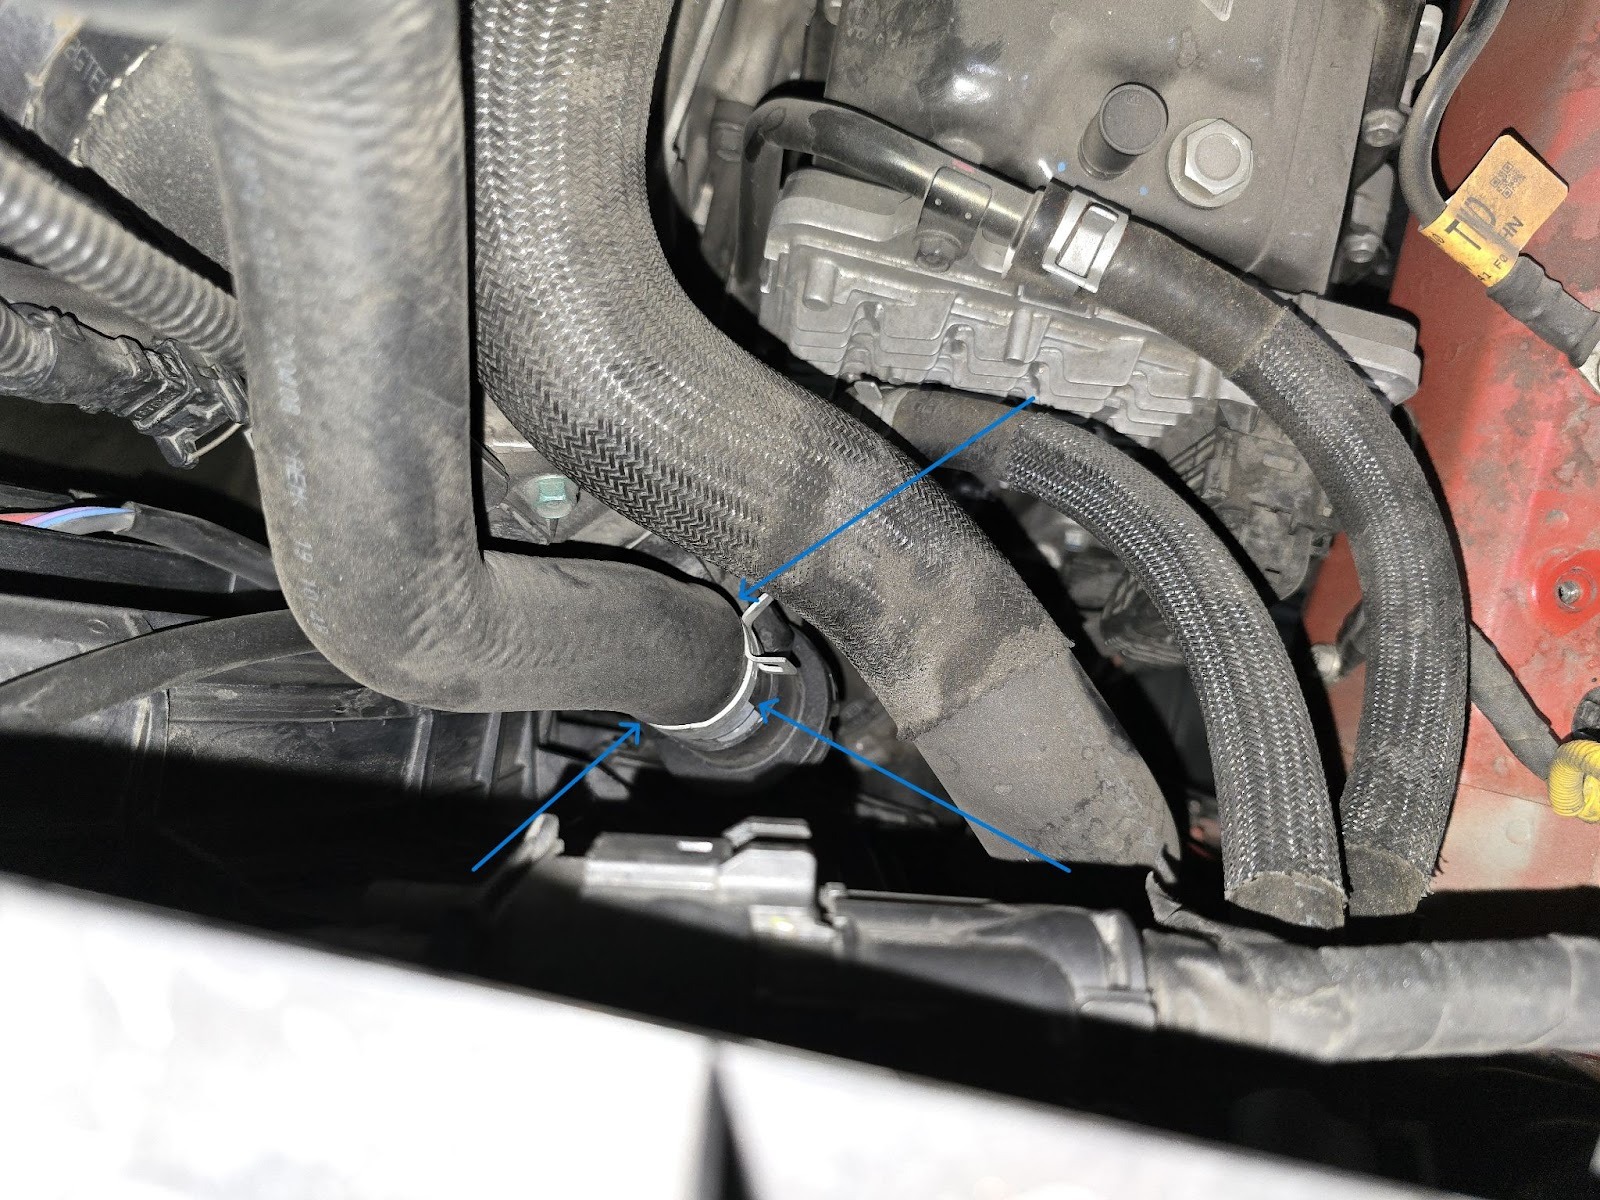
The OEM valve is located at the end of that hose, it can be removed with 4 x 10mm bolts. Turbosmart recommends that OEM parts are set aside and retained for safekeeping.
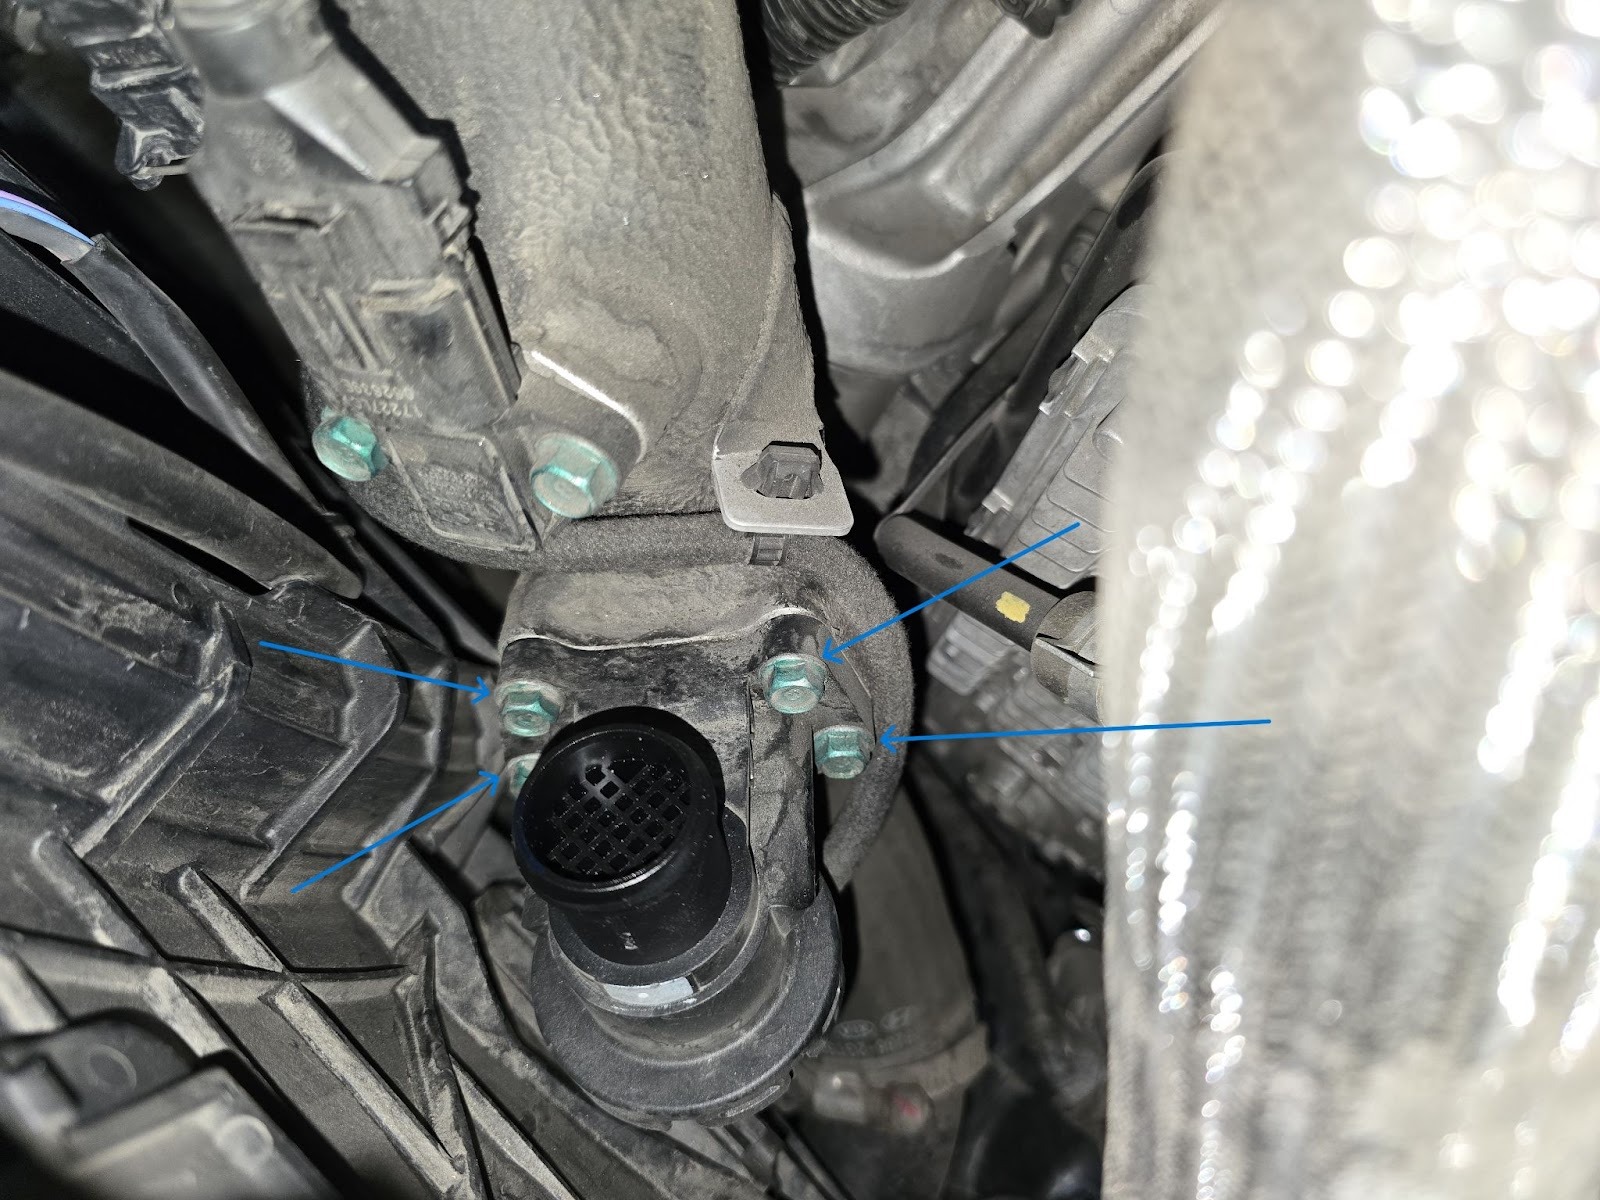
Once removed from the car the reference hose can be removed a small spring clamp holds on the reference hose.
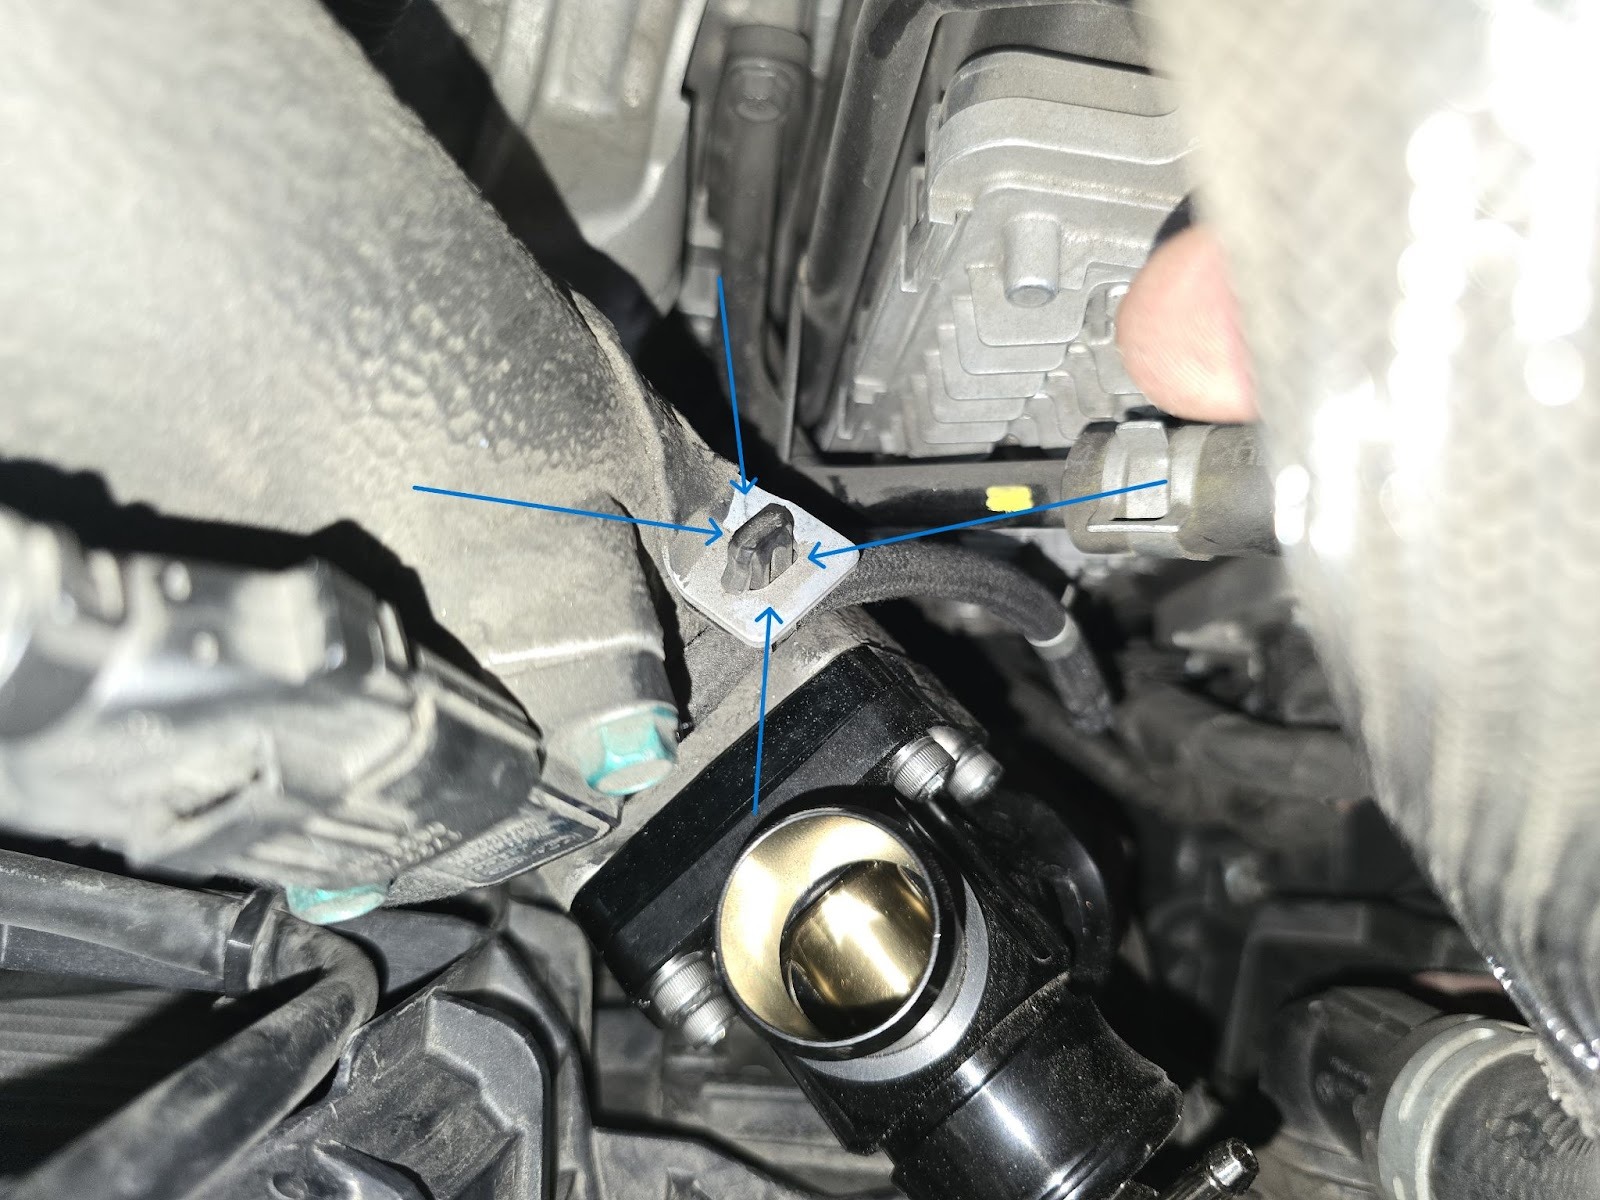
Using the 4 allen keys screws included. install the new valve. Once installed use the supplied hose and tension clamps to install the new reference hose.
Refit the standard hose on the air intake as well as the diverter valve outlet, using the worm clamp provided in the kit.
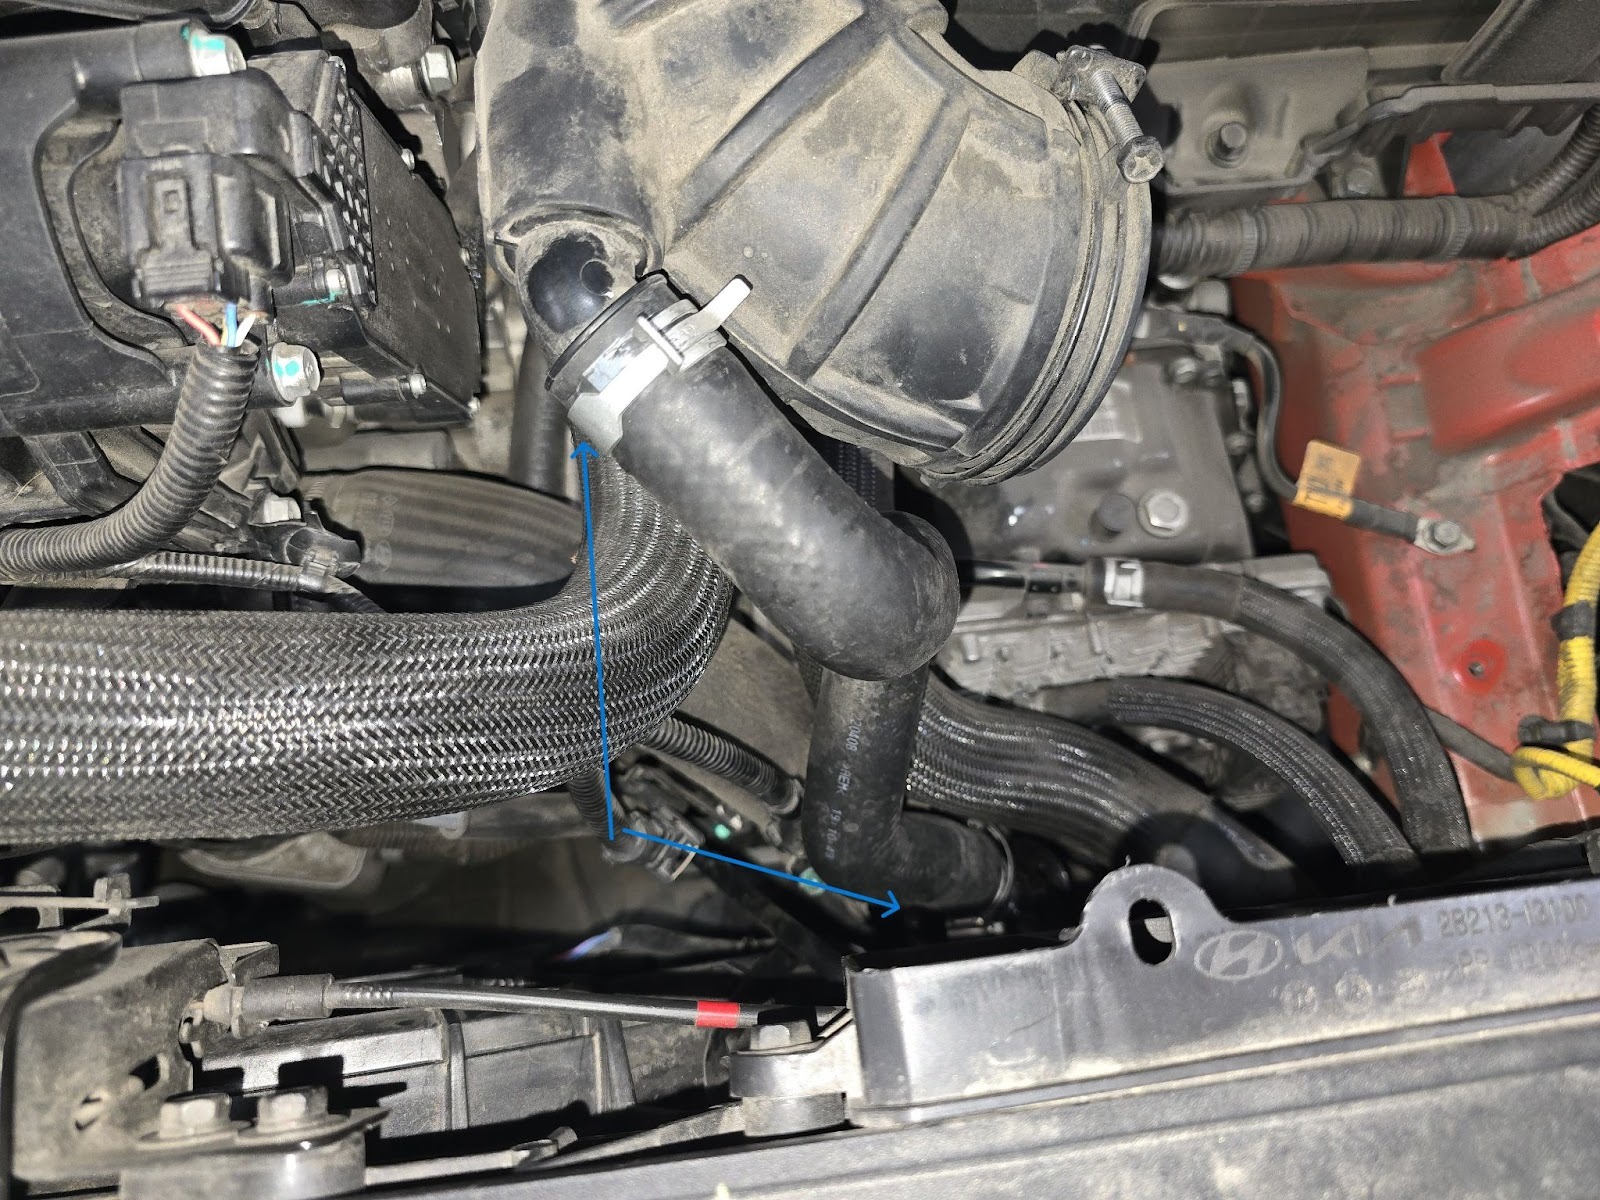
Finalise airbox in to the car, 3 10mm bolts as well as the hose clamp need to be tightened up to finalise fitment onto car.
Troubleshooting
- Check the vacuum hose for splits, cracks, loose connection, kinking or any obstruction – old or fatigued hose may collapse under vacuum causing an obstruction.
- With the engine running remove the vacuum / boost hose from the nipple in the cap of the BOV, there should a loud hissing sound. The engine should idle poorly, double check by covering the end of the hose with your finger – otherwise the hose is blocked.
- Check to see if the BOV is blocked or contaminated with dirt or debris.
- Ensure that the vacuum / boost source is not shared and that the vacuum source is directly from the inlet manifold.
- Check the seal between the charge pipe flange and the BOV. Make sure the supplied O-Rings are installed properly and the BOV Flange is secured on the compressor cover flange with the 3 supplied screws.
- Ensure the spring clamps are secured on silicon hoses and fittings.
- If the valve does not open properly or is slow to react, it could be due to the mapping of the drive by wire system from such things as aftermarket chips and engine tunes. Check with the tuner that the mapping of the throttle is the same as OEM.
- The valve may not open if the engine is just free reved. Check that the valve operates by driving the vehicle.
Adjusting your BOV
- Start with the BOV cap at the maximum soft position (The indicator O-Ring should be completely covered by the edge of the cap)
- With the engine at idle the exhaust port should be closed off by the piston – the piston should be hard against the seat and not floating or moving
- Free rev the engine and back off quickly, the engine should return to normal idle speed – if the engine drops below idle or stalls increase the spring tension by one turn
- Repeat this process until the engine free revs and returns to normal idle speed
- Test drive the car and ensure that when decelerating or changing gears that the engine has minimal backfiring and no stalling. If backfiring is excessive or stalling is noticed then check all connections made during the installation, otherwise increase the spring tension.